We did A $9,000 Rehab on My Son’s $64,000 Hoarder House!
In July of 2023 my oldest son bought his first house. He had just turned 20 years old and had 2 years of work history at Walmart. This house is in our extended neighborhood, which is getting extremely difficult to find affordable houses in. Our next door neighbors house sold this summer for $255,000 and it is only a 2 bed 1 bath not updated house! This house about a mile from our home came up for sale with a list price of $59,000. Our oldest bought the house for $64,000 in a multiple bidder scenario.
This house needed substantial work. It has had years of neglect and was full of stuff.


Rehab overview:
In total, prior to moving in this rehab cost our son $9,100. Myself and Mrs. C. donated significant amounts of labor and of course usage of tools and leftover materials from other jobs. Originally I estimated $7,000 for the majority of the rehab, however I had assumed getting used cabinets (he got new), and did not account for needing to replace 2 windows.
Before showing pictures, the goal here was to make this house clean, safe, and functional. The goal was not to do an HGTV flip where the house looks brand new. That level of finish would probably add another $25,000 to the price tag. With the original purchase price of $64,000, $4,500 in net closing costs, and $9,100 in this rehab, his total all in on this house is $77,600. I would estimate today as it is, the house is worth between $100,000 and $110,000.
Before Pics:
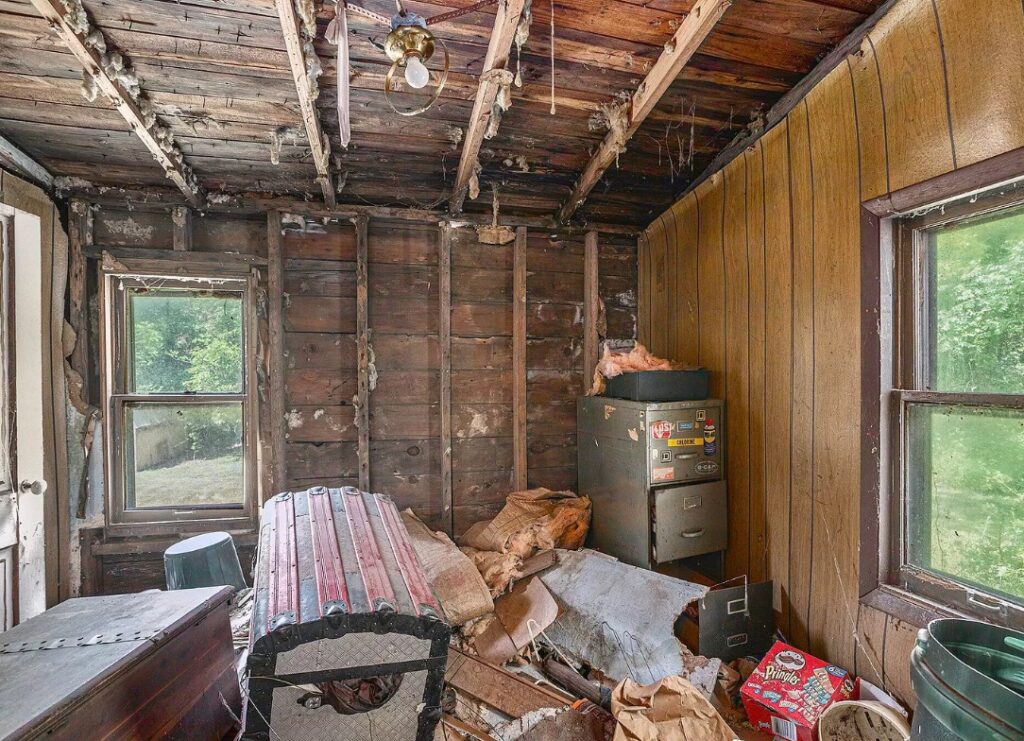
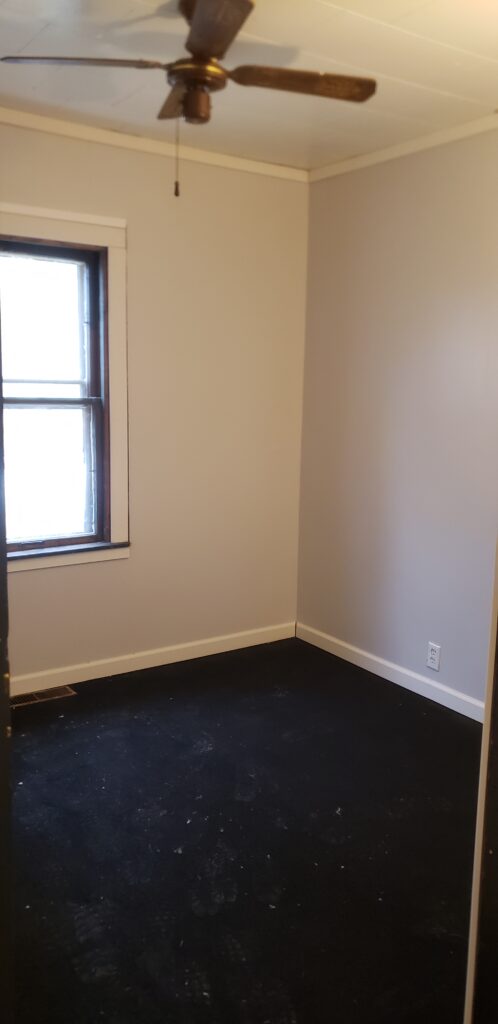
Back bedroom next to the bathroom
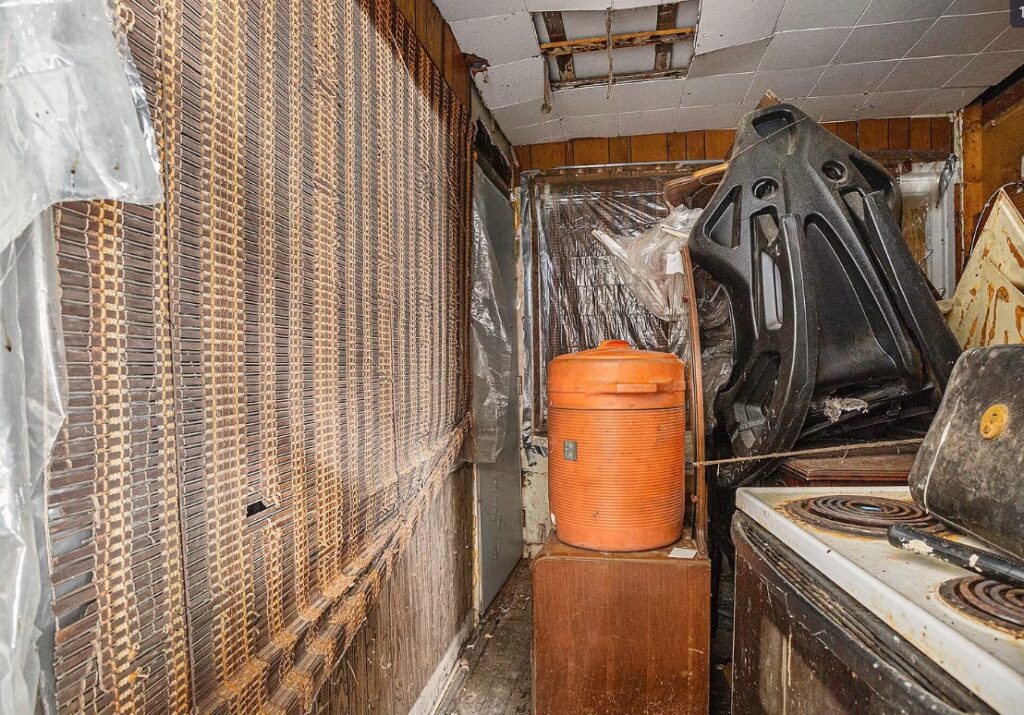
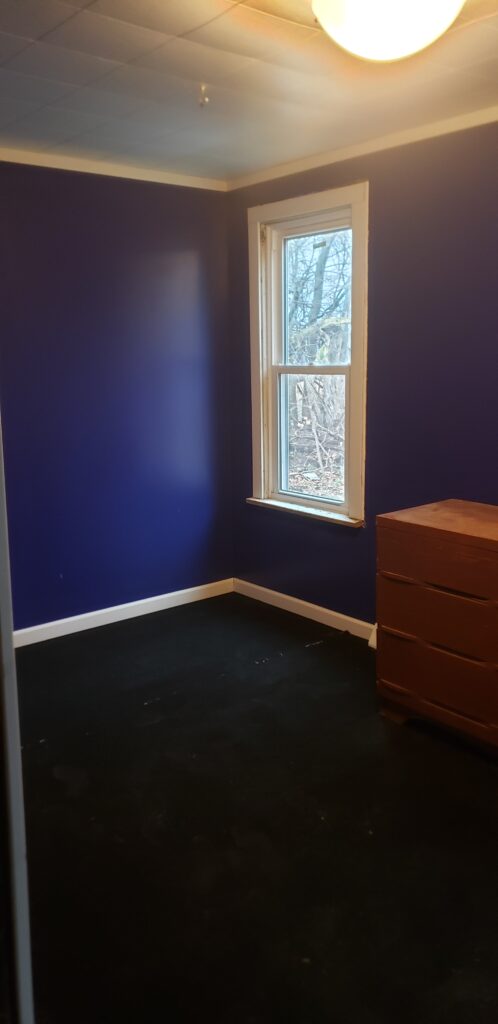
Bedroom off the left side of the Kitchen, we call it “The Snake Room”.
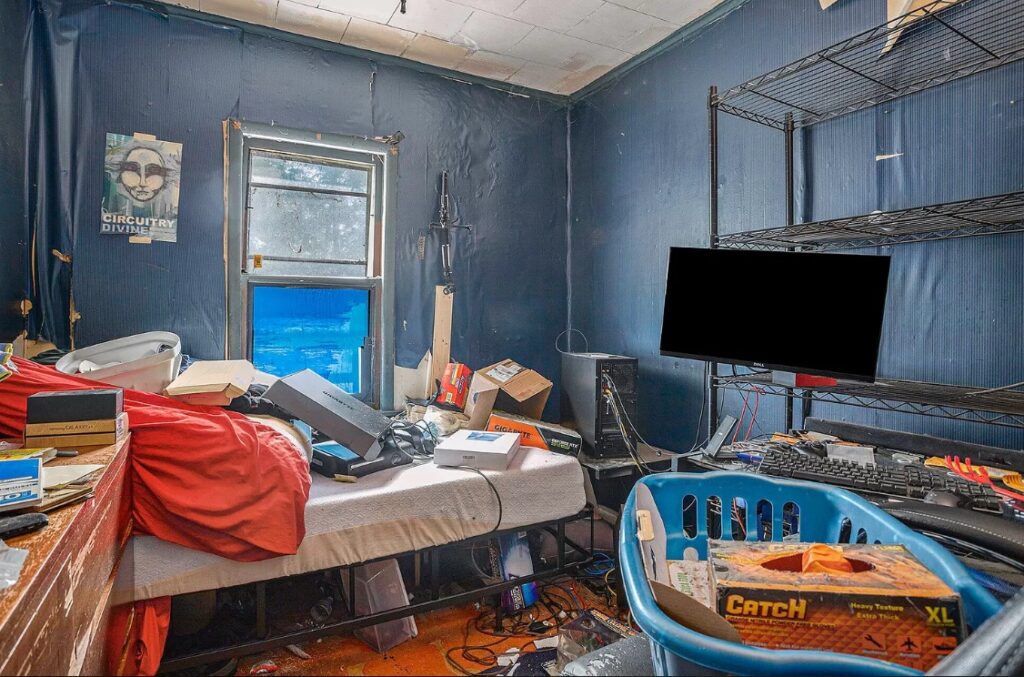
Bedroom off the hallway
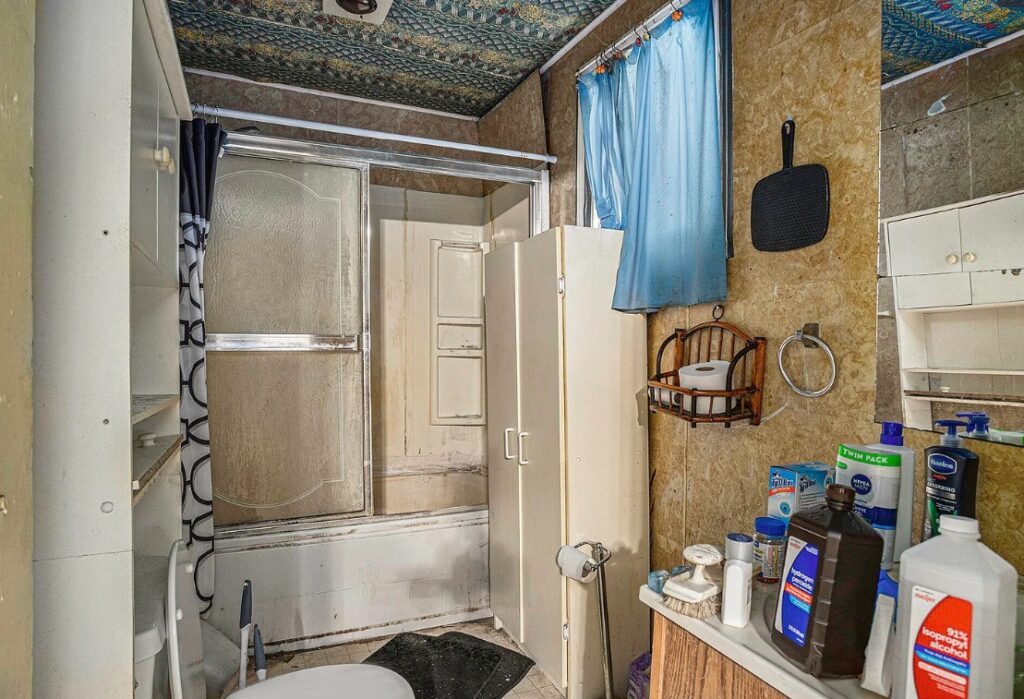
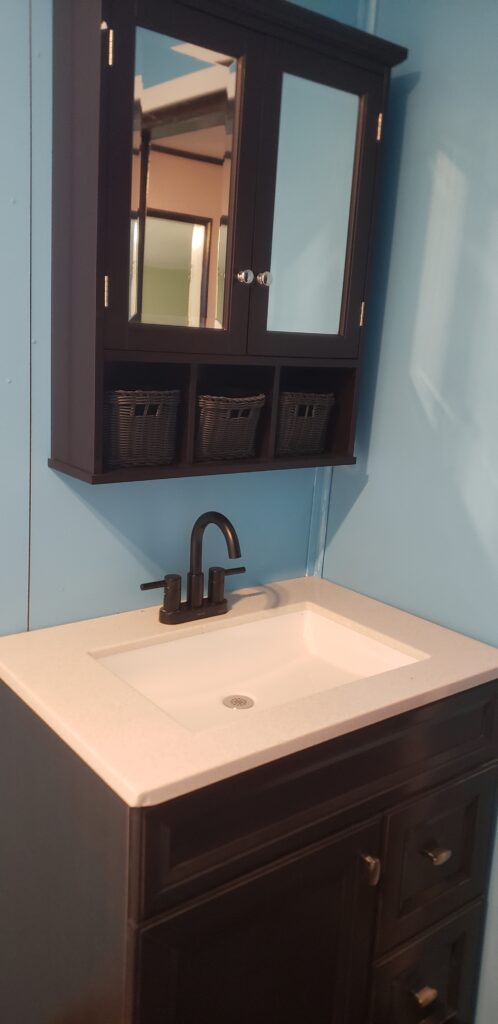
bathroom

Kitchen. It’s much grosser than it looks. Don’t open the fridge!
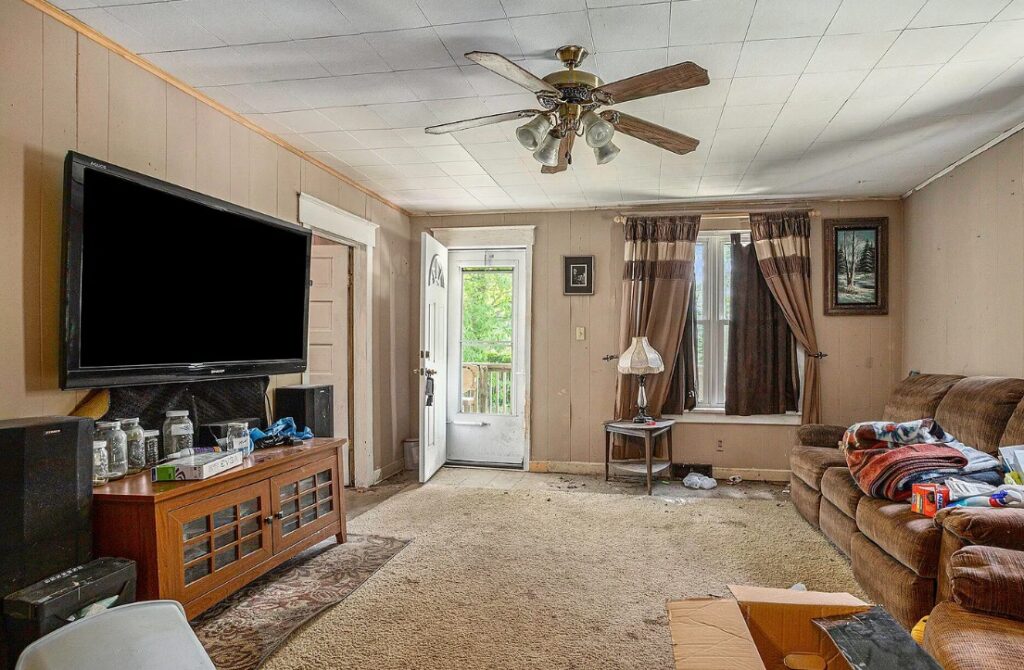
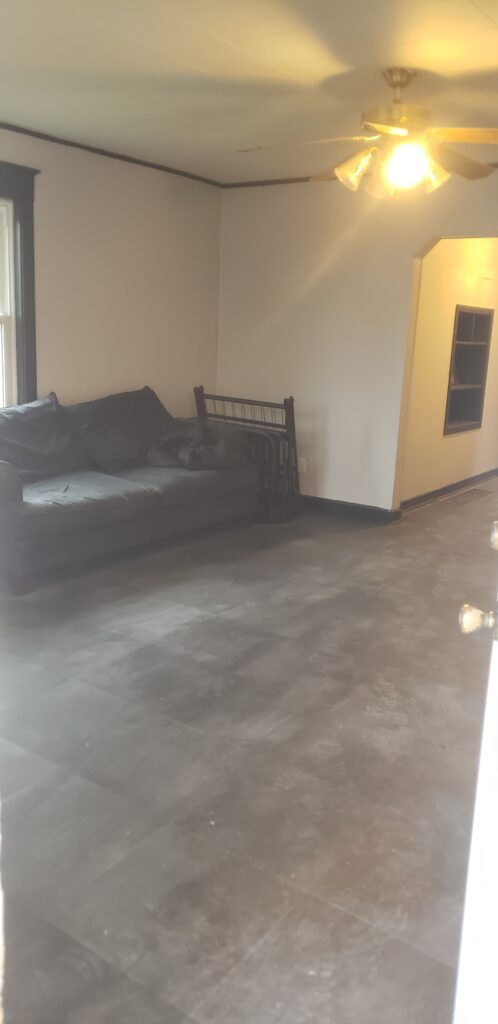
Living room, in the best condition.
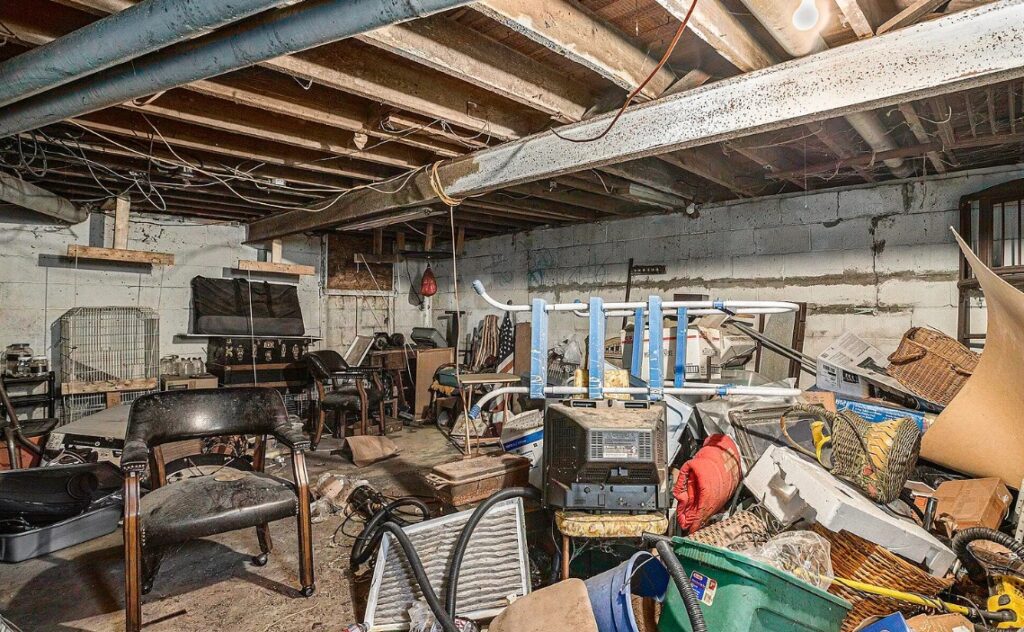
This basement is FULL
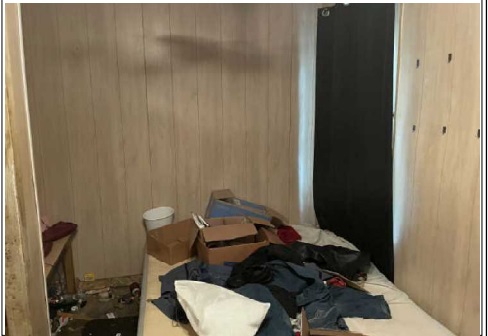
Bedroom 1, off the living room. The only picture I have the obstruction on the left side is the closet in the middle of the room.
After Pics:

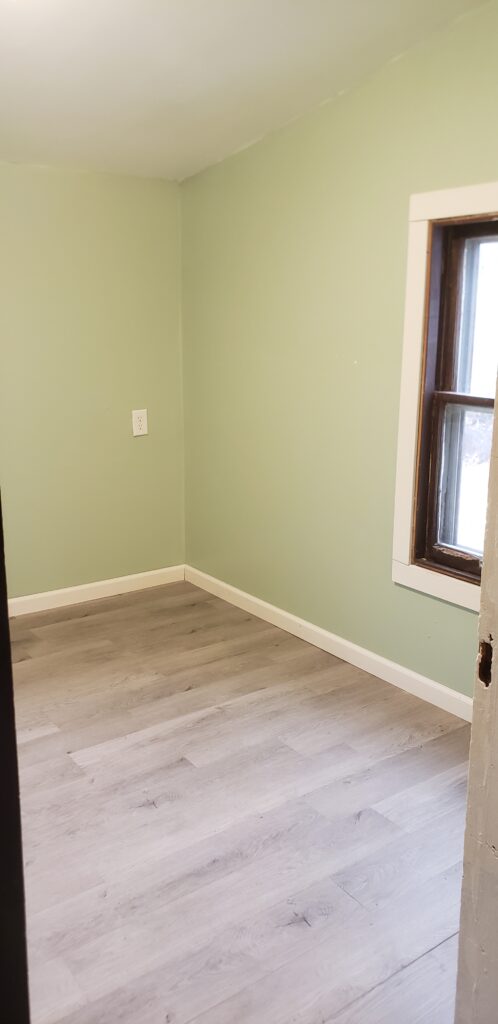
Main bedroom, closet now behind the door.
“snake room” Much less Snakey than it was before!

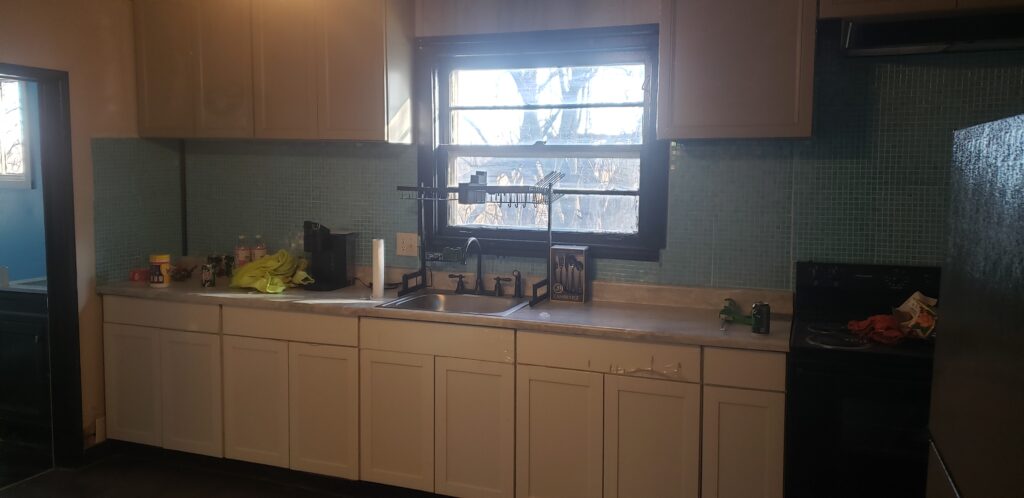
Kitchen, new cabinets, haven’t taken the plastic off yet. Floor is the same flooring as the living room.

back room
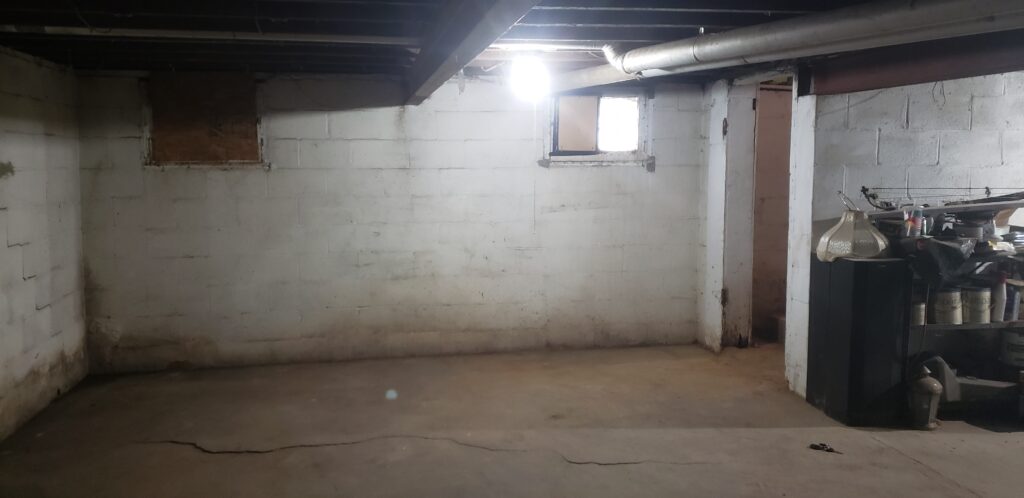
Phase 1: Getting The Junk out:
This was some serious work. We got a 20 yard dumpster and started a fire pit. We burned all the wood, separated out the scrap metal and did our best to optimize stuffing the dumpster. I jumped up and down on it several times to make more room. The first 2 trips back to the scrap yard netted $250, and we found another $150 in change in the house.
The basement was chock full of STUFF. Not shown in the pictures was the back part of the basement that was the utility room. This section is roughly 8 feet wide by 12 feet long. This is the area where the bathroom leaks had rotted away the floor joists. There was broken furniture, 3 old water heaters, and a shelving unit with long term food stores.
Even after filling the dumpster, we still routinely had trash to remove. We consistently took bags of trash each week to another property we have that we don’t fully use the trash cart.
We paid $420 for the dumpster and $35 to rent a trailer from Uhaul for the scrap metal.
Phase 2: Rebuilding the structure:
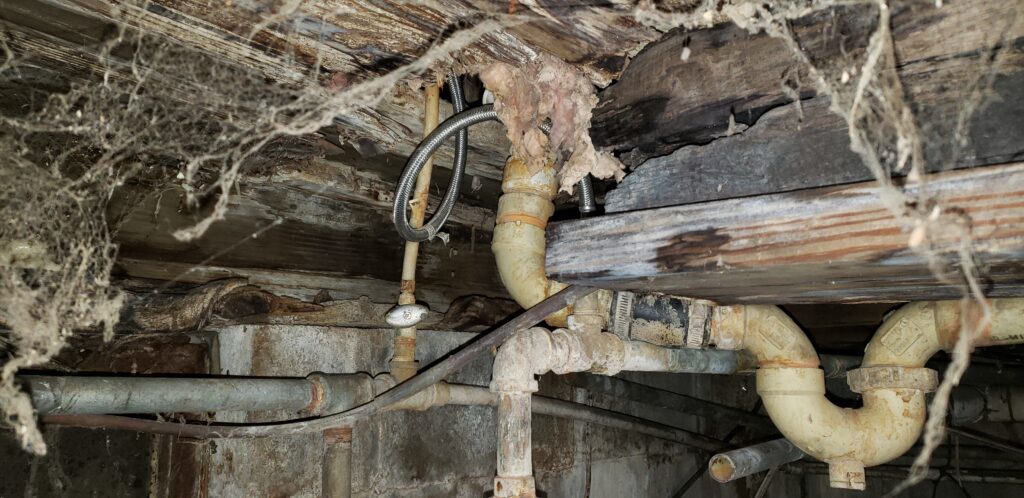
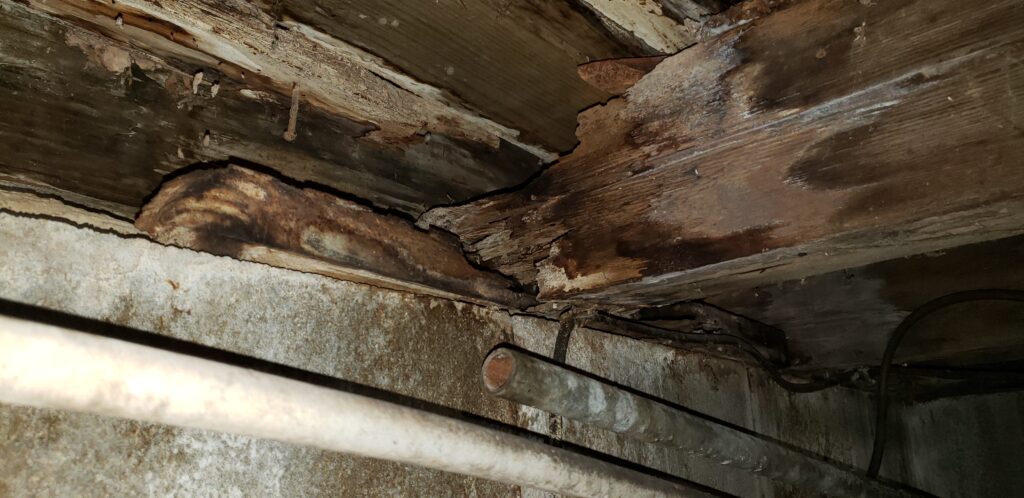
This house had some problems, and the extent of them was hidden by the junk. The primary problem was that a jet tub had been installed many years ago, and it had a leak, that went undetected or at least unresolved for many years, possibly decades. This leak led to the entirety of the bathroom subfloor needing to be removed, but it was much worse. Underneath the subfloor this consistent water damage had rotted away 3 floor joists that support the house!
The first project I did was sistering up these beams and getting this area of the house stable.
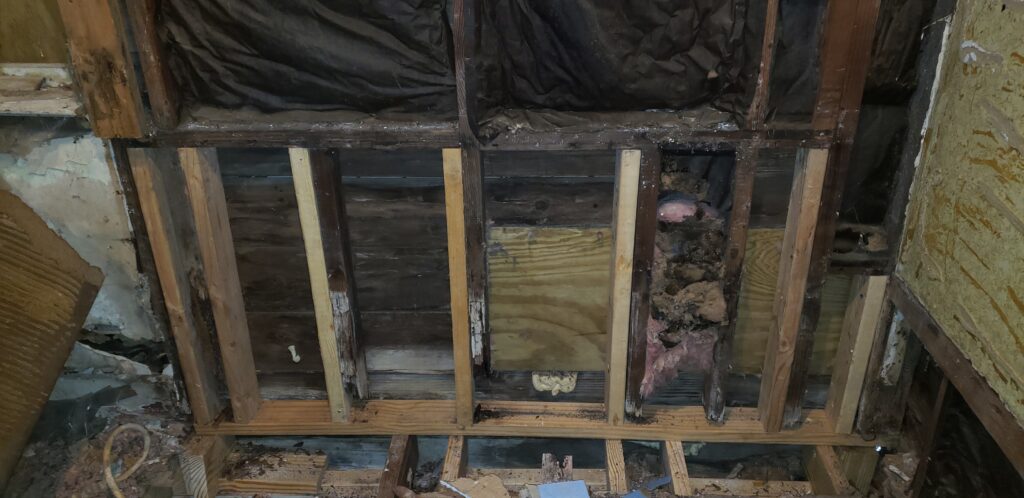
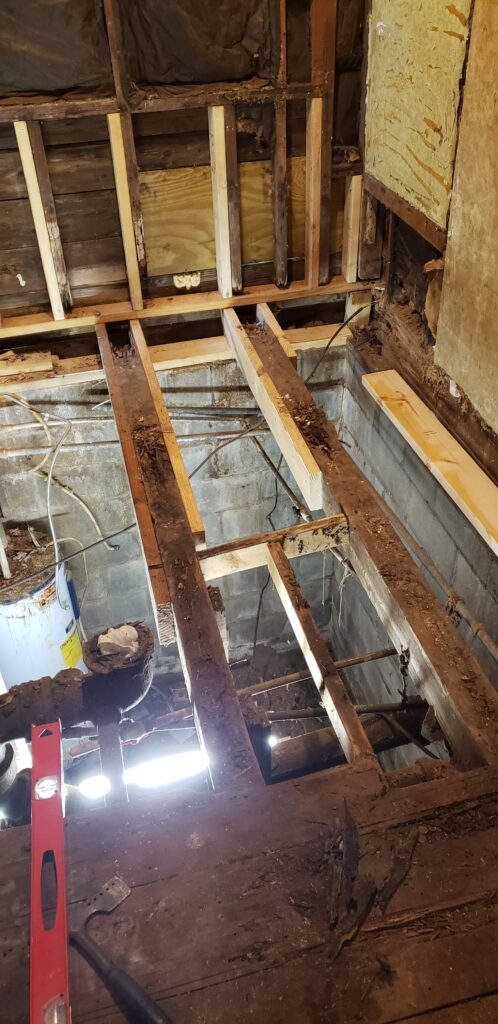
This was not the only area of the house with some structural issues. The kitchen sink and dishwasher had some similar problems, which thankfully were limited to the subfloor. We removed the 3 layers of flooring in the kitchen, and about a third of the subfloor and replaced with new. I spent $200 on 2 house jacks and $380 on lumber.
The “snake room” as we call it because we found a snake in it while installing Drywall the lender required us to install in this room in order to close on the house, had some rotted sub floor as well. I’m not sure the actual source of the rot, but it all needed replaced. I did very minimal work to the joists. This part of the house was over a crawl space, so it was less nerve wracking to fix than the bathroom which was over the basement.
Once the snake room, the kitchen, and the bathroom all had a solid subfloor we were ready to move on:
The main bedroom had a closet in the middle of the room. I think it was originally put there to hide a piece of ductwork, but I would much rather have the ductwork exposed than have a closet in the middle of the room. We removed this closet and built a new one that takes up the space on the backside of the door to minimize interference with the room.
Phase 3 Systems:
Plumbing: Virtually all of the plumbing in the house needed to be replaced. We replaced 95% of the supply plumbing in the house (everything from the pressure tank down), and about 50% of the drain piping in the house. I initially wanted to do this all in PEX, however there was significant cost and schedule savings by sticking with CPVC. Total plumbing cost was around $800.
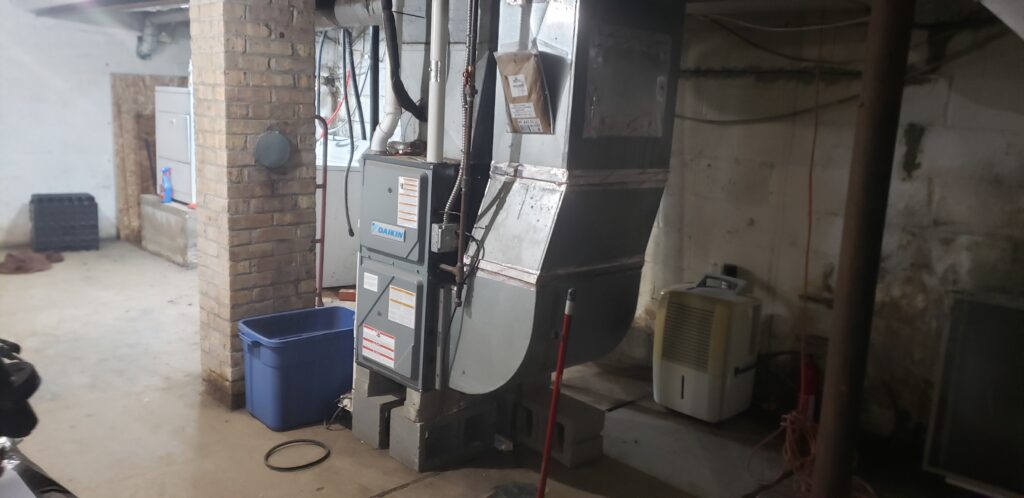
HVAC: The furnace worked! We did need to fix a few ductwork runs. The ductwork to the snake room and the bathroom both needed replaced.
Electrical: Oh boy. This was a lot of fun. I added several lights to the basement. The basement was dark, dingy, and full of trash. Having new lighting down there made a world of difference.
I had to remove several electrical runs that went to nowhere. There would be live wires just terminating in the basement not in boxes and without wingnuts. I replaced most of the outlets and light switches, and added appropriate receptacle extenders throughout. I rerouted the stove plug as well. There was a bit more troubleshooting. I highly advise getting a Fluke pen and an outlet tester. These things are lifesavers.
As a bonus there is electricity already ran underground to the shed. It also appears that electricity was ran out to the old garage that over the last 40 years has been taken over by the elements. In the summer one of my goals will be to clear out this garage and trace the wires to see if this power can be restored. The downside to these lines already being ran is we don’t know their exact paths.
Phase 4: Finishing Rooms:
Walls:
Originally I had bought 40 wall panels on clearance from Lowes with the plan to use them instead of drywall. These were of course a pain the butt to move from Lowes and into the house. When we started trying to use them we quickly learned that paneling is largely unforgiving. With a 100 year old home that is not level, plumb, or square, it just isn’t feasible to use paneling. We used a few panels in the kitchen and bathroom, but quickly abandoned them. We did use these as an underlayment for flooring in the back bedroom and we also paneled the walls in the breezeway leading to the basement. I paid $6 a sheet, for a total of around $250. We sold the remaining 12 panels we had for $5 a piece.
Insulation: The snake room, the bathroom, and the backroom all needed insulation added. Adding insulation, especially with open walls goes fairly quickly. Total insulation cost was around $200.
We ended up fully drywalling all 3 bedrooms. My drywall skills have greatly improved over time. Certainly not a professional level yet, but getting there! The results are acceptable and these 3 rooms look much better than before. We drywalled over the existing plaster in 2 of the bedrooms, which allowed us to use 1/4″ Drywall. 1/4 drywall is significantly lighter and costs about the same as 3/8. We spent $565 on Drywall and drywall supplies. I had to drywall the ceiling in the snake room, which was not fun. Having 1 to 2 helpers is important, or get a drywall lift.
Painting:
Paint was a big area of savings. From us rehabbing 10 properties over the last 5 years we have built up a significant stash of paint. We had enough primer and “paint and primer” mix to do the bedrooms we drywalled as well as the ceilings in those rooms. The kitchen, hallway, and 2 bedrooms were painted with common colors we have in all our rentals. I think our kid ended up saving north of $300 from our existing paint stash. Total paint cost was $275.
Flooring:
The kitchen and the snake room needed an underlayment added over the subfloor we replaced. Originally we put down an inexpensive sticky back tile in the kitchen, but these tiles were subpar. They were very thin and the ends bowed up. We had to undo this and bought a thicker sticky back tile that we used for the kitchen, hallway, and living room.
We installed carpet in 2 bedrooms, and this could have been done much better. At the point where we were installing this flooring we were in a sprint to finish those rooms up. Originally we were going to do a sticky back tile, however the floors were too uneven for that to work. We ended up buying carpet rolls and gluing them down vs stretching. It works for now and will probably need replaced in 5 to 10 years. We did put sticky back tiles in the snake room and left over carpet squares we had from a previous job in the back bedroom. We spent around $1,000 on flooring.
Trim:
I hate doing trim. If there is any part of a job I look at and find embarrassing, it is my trim work. Getting the angles right is difficult and having rooms that are not square level or plumb makes the errors in the trim stand out. Trim is also pricy! We get all the trim at Menards which is significantly cheaper than Home Depot and Lowes, but it is still a sticker shock when you get the total. We spent $500 on trim.
Bathroom:
We installed a new shower/tub, a sink, and a toilet. Getting these plumbed in and tested was a significant win for the functionality of the house. This was the first time we installed a tub, so we got some new learnings. the drain plumbing was difficult due to the tie in with the main stack. the main stack is cast iron and the original threads have been long gone for probably 40 years. We ended up shoving a pipe into it to get it stuck in there, then glued it into the tub drain. To seal it we JB welded the whole thing in place at the main stack. The total for the tub, shower surround, toilet, and sink was under $1,000.
Kitchen:
Rather than wait to find a set of used cabinets, Mrs. C. and our kid decided to buy new cabinets. Lowes had a really good sale on cabinets they were discontinuing and with our Pro account at Lowes if we spend over $1,500 at once we can get an additional discount. We installed new countertops and a sink. In retrospect we should have gotten a bigger center cabinet for the sink to go into, we were limited to a smaller sink that ideal.
We picked up a used stove and fridge from Bills Appliances in Niles, MI. Their stuff is super clean and always at great prices. We paid just under $600 for the stove and fridge. I moved the stove plug from the North side of the room to the South side of the room. I also ran electricity for an overhead exhaust fan and installed that as well. We got the fan on clearance from Lowes for around $60.
The Backroom:
The backroom which used to have full picture windows wrapping the 2 exterior walls was saved for last. We were able to make the rest of the house functional first and since this was an additional room got pushed to the back as we finished everything else. Thankfully the window openings were close to a standard size. Rather than have the room full of windows we installed 2 windows and boarded up the rest. The cost for the windows was just under $500. On the exterior of the house I took down the boards covering the window openings and recut them to fit to match the depth of the wall so they could be sided over in the future. On the inside I drywalled over the location of the old windows. We had to get some new ceiling tiles to patch the missing pieces, and then I did 3 coats of ceiling paint. We installed some of the left over paneling as a smooth surface for the flooring and installed carpet tiles.
(need a new picture)
Misc:
We bought 2 doors which needed to be cut to fit for the bathroom and the bedroom. I try to get solid wood doors from places like Restore because new solid doors are expensive and the hollow core doors are garbage.
We needed to get new hookups for the washer and dryer.
Although this cost nothing, it was a major improvement: We cleaned the inside and outside of all the windows, including the storm windows. This was a major pain, as taking storm windows down and replacing them sucks, but it made a big difference in how the house looked and felt. The newly cleaned windows let a lot more light in.
In general there was a ton of cleaning that took place, both cleaning the original mess in the house and keeping up with the construction debris.
Our son already had a lot of furniture, however Shelving was a strong need. We sold the left over paneling for $60 and used that to buy 2 large bookshelves, 1 is in use in the main bedroom next to the closet and one is in the back room. He did buy a new bed and a new bed frame. Everything else was used furniture that someone gave him or that he got from a thrift store.
Current Status:
With all of these fixes, our son has been able to move in! He has been living there for about 2 weeks now and all is going well. The cheapest 2 bedroom apartments in Benton Harbor, MI are running $950 a month right now, while our son has a 3 to 4 bedroom house that is $480 a month, including his taxes and insurance. Yes he had to pay over $10,000 to get into it, and then almost another $10,000 to rehab the house, however those actions have added to his equity in the home. The property is now likely worth between $100,000 and $110,000, and when the exterior work is finished in the summer will likely be worth closer to $150,000. This house will be a very affordable long term living situation for him. It also provides a massive amount of privacy that you just can’t get at an apartment building. His closest neighbor’s home is 500 feet away, as opposed to the 4″ away the closest neighbors in an apartment building are.
Future:
Basement windows: These will be easy to replace, We will get plexiglass cut and install in the existing frames, It should cost less than $50 to repair all the basement windows. Getting natural light down there will be a big win to make it feel better in the basement.
Siding:
In the spring the peeling paint on the East and West sides on the house will need to be scrapped and painted. This will cost a few hundred bucks, but make the house look much, much better. The areas of missing siding around the back room and where the siding is missing by the air conditioner will get replaced with Smart Siding. This stuff comes in 4′ X 8′ sheets and interlocks with each other. It is really easy to install.
Gutters
Mainly the East side of the house needs gutters. This is where we get some water intrusion into the basement. I plan to add gutters and to also build up the grading around the house. This is always fun. I would estimate $500 for the gutters and about $300 for a truckload of dirt.
Freeing the Garage:
This garage was likely built in the 40s and the roof fell in sometime in the 80s would be my best guess. We need to clear all the trees and vines away, remove the old roof, and clear out the accumulated dirt and debris along with the stuff that was originally in the garage. Ideally the garage can be used to some degree in the future.
Cleaning up the yard:
There was once another garage building out in the woods that was built of wood, it collapsed once upon a time and all the debris needs to be cleaned up. There is also a significant amount of trash there as well.
That’s where we are! The primary mission is accomplished! I’ve vey proud and thankful that my oldest owns his own house and has a long term economically sustainable housing situation.
Leave a Reply