Building An Arcade Game Room For Our Airbnb Apartment Building
I’m building an amazing arcade game room in the garage at our Airbnb apartment building! In March of 2022 we purchased a 6 unit apartment building. Currently 2 of the units are for long term tenants, 3 units are for Airbnb short term rentals, and the 6th unit is currently being rehabbed and will become a 4th short term rental. The property is within a few miles of Lake Michigan and is also within a half hour drive of the nuclear plant that needs seasonal workers in the spring and fall seasons. Although our primary focus during 2022 was getting the units rehabbed and set up as Airbnb’s, there are several additional amenities we wanted to add.
So far we have added a guest laundry room and added 2 parking spaces to the property. The laundry room is free use (no coin op) and has 2 stacked washer/dryers, as well as large folding counter. I plan to add fenced in areas for dogs (we are pet friendly!), as well as a jungle gym play structure for kids outside. We also have 2 more parking spaces in the works that will be finished shortly. The coolest addition I want to make though is absolutely the game room.
The Garage:
The property came with a 20 X 30 garage that has 2 man doors and no garage doors. The building is separated into a 10 X 20 section and a 20 X 20 section. The garage doors that led to the 20 X 20 section were walled up many years ago and both sides of this garage have been used for tooling and equipment storage. I wish I had pictures of the garage when we purchased it. It was FULL of appliances and material. You couldn’t walk in it when we bought it. This garage thankfully has power ran to it.
We originally emptied out most of the stuff in this garage only to refill it. As part of our rehab we replaced all the appliances in the building and this garage was a good staging area for the used appliances we were getting rid of. We moved all of our cub scout storage into the garage (Mrs. C. runs a local cub scout group), and we have also stored our misc. materials, appliances, furniture, and tooling in this garage.
Emptying The Garage To Build The Arcade Game Room:
This was much easier said than done. I spent probably a good 20 hours emptying this garage. I did a dump run, a scrap run, and took 2 van loads of wood to my burn pit. All the cub scout stuff and odds and ends for the building went to the basement for storage, and I added a bunch of stuff to our pole barn, which is full again. I swept the rafters and the garage multiple times to get the room clean.
Here’s a video of the garage after I had already cleared out about half of it:
https://www.youtube.com/shorts/zgb5JAxOTd0
Planning The Arcade Game Room:
I originally started mapping out on graph paper how we would set up the game room and I grew frustrated with how many times I had to start over when I wanted to rearrange the map. I ended up making my graphs on Excel and that allowed me to copy the sheets and highlight and move each object around. We certainly wanted to make sure that we did not crowd the space and there would be enough room to enjoy all the activities we add. Our floor area is closer to 19′ X 19′ when adjusting for the wall spacing.
After several iterations this is what we landed on:

The lighter outline is for the play area. The darker coloring is the game equipment itself.
Buying the Arcade Game Room Equipment:
I originally planned to buy everything for the game room used, however we found that there were some amazing sales on game room equipment going on between Sam’s Club and Walmart. Most of these items were listed at far lower prices than what we could buy used, and they would be delivered to my front door for free. (Sorry UPS / Fedex guys!)
Here’s what we ordered:
- Air Hockey table $200 (was $400)
- Foosball table $100 (was $350)
- Ping Pong Table that folds to half $150 (was $350)
- Basketball shooting alley $80 (was $180)
- Pacman home arcade $200 (was $430)
- Terminator 2 home arcade $300 (was $700)
- Mortal Kombat home arcade $200 (was $430)
- Simpsons home arcade $200 (was $700)
We were able to get all of that stuff above for only $1,430! We also already had a roll a score in our garage, this is a home version of skeeball. We bought this several years ago for I think around $40 at a thrift store, the retail price on similar machines is around $400. We will be including one of our combo vending machines in the space as well. Because we were able to get all these items so cheap we will always be ahead of the curve on resale value if we choose to changeup what we have or get rid of the game room. All of these items used sell routinely for more money that what we paid for them.
All of the arcade games are Arcade1Up 3/4 scale arcade games. These are made for home use and many people in the Arcade1up community think that these machines have no place in a commercial setting. I think if I were opening an arcade to the public it wouldn’t work, as these arcades are much more fragile than original machines. For a 6 unit space that most people will only use sparingly, I think it will be OK and I am willing to risk the money on it.
Rehabbing The Space:
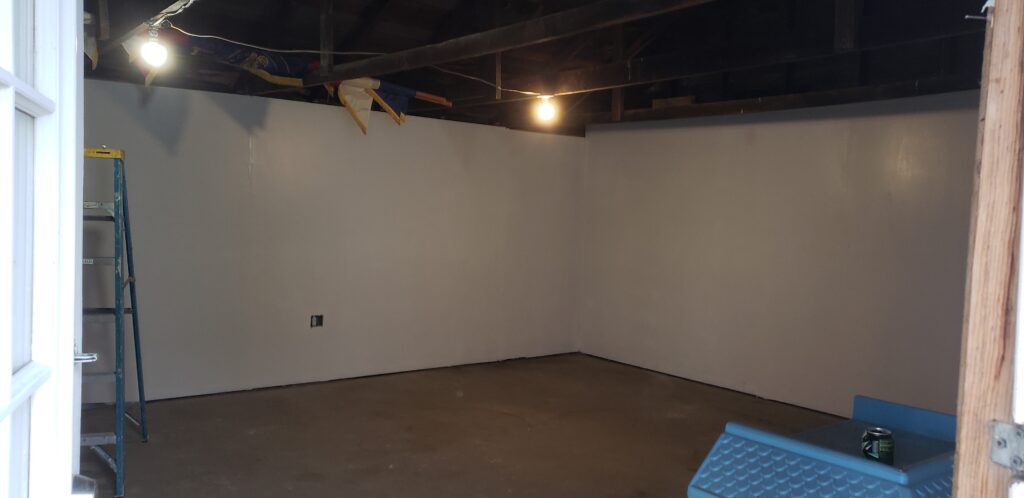
With a fully emptied garage, this place is ready to rehab.
Step 1: Cleaning: This garage was dirty! I needed to sweep the ceiling, the walls, and the floors. I did 3 rounds of sweeping, then mopped prior to painting. We also had grass growing in from outside, so we needed to cut that back and seal up all the openings.
Step 2: Run electricity: There is a subpanel in the 2nd section of the garage, which will remain tool storage, and I ran a 20 amp circuit with 12 gauge wire off of this into the game room. I put 3 outlets on the East wall and this should be sufficient for our needs. In the future I may run another line on the West wall. I replaced the existing overhead lighting with plug ins. There were only 2 directly wired single Edison bulb fixtures in the garage. I replaced this with 2 double outlets and installed 4 18W 43″ tube lights which are a light bulb and fixture in one. Our utility provided these to local stores to sell at $1.49 a piece to get people to swap from Fluorescents to LED. This room is much brighter now! I spent $23 on running the electrical. This was for the breaker and the boxes. I already had the outlets and the wire needed. The value of the wire used was probably around $50.
Step 3: Insulate: As of right now I don’t plan to heat / cool the building, but if I do in the future I don’t want to be burning energy for no reason. Insulation is cheap and its much easier to do while the walls are exposed. I insulated the walls prior to installing the drywall. I was surprised at how easy it was to do and had the all the wall spaces insulated in a couple hours. The ceiling will be left open wood for now and I will insulate in the future if/when I deem it necessary. I spent $169 on insulation at Menards. Insulation at Menards was significantly less expensive than Lowes and Home Depot. I think I would have been north of $250 for the same stuff had I not driven to Menards.
Step 4: Install Drywall: 3 of the 4 walls needed drywall added to them. The wall separating the 2 garage spaces already is covered. I installed drywall up to the height of the roofline, leaving the ceiling open. This is a bit over 7′ tall. It’s a garage and doesn’t need to be perfect. I hung the drywall myself. I’ve done better drywall finishing before and I’m not quite sure why I ran into issues, but you can certainly see the seams on this one if you look for them. It’s a garage though. I spent $143 on the drywall at Home Depot and another $18 for mud at Lowes. Most of this mud is left over for use on future projects.


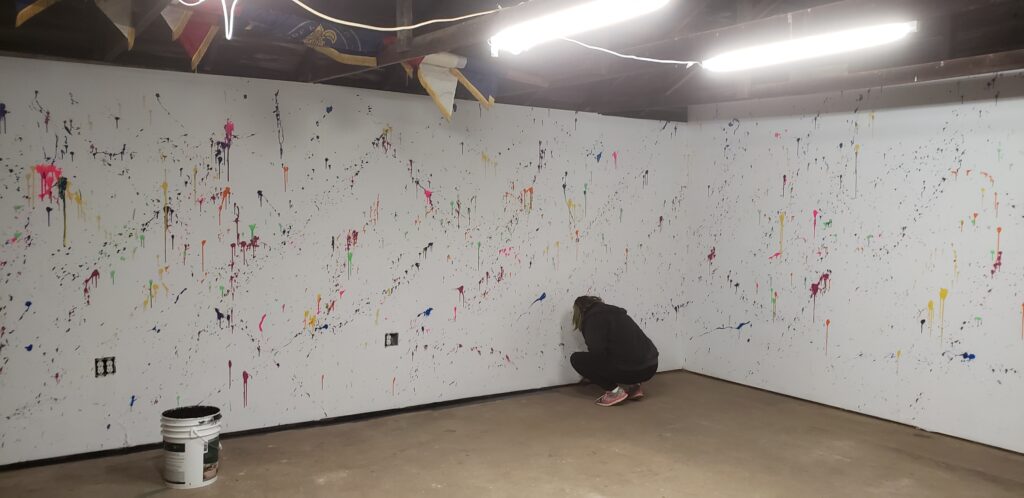
Step 4: Paint: One of the benefits/drawbacks of owning 10 houses is that you end up with an impressive paint collection. I utilized existing paint for the walls. First I did a layer of primer, then white semi gloss paint. Mrs. C. has always wanted to splatter paint a room, and this was the perfect opportunity. Her and Kid #2 splatter painted with some bright colors. I think she spent around $30 on this paint.
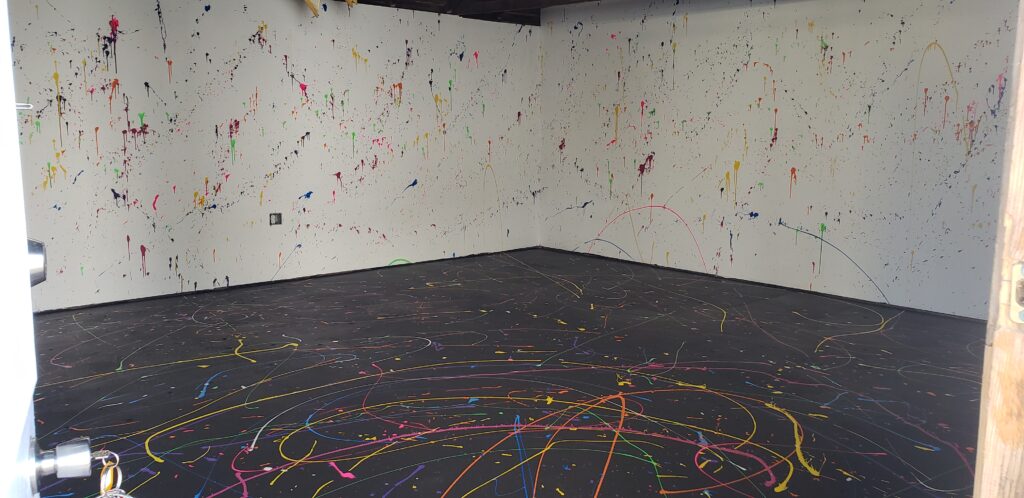
Step 5: Flooring: The flooring is bare concrete and looks dull. We had about 4 gallons of black porch and floor paint left over from another project and used this to paint the floors black. Mrs. C. then splatter painted the floor.
Here’s what the final product looks like!
Installing The Equipment:
Everything is heavy! The heaviest by far is the vending machine. I have moved these several times and I hope this is the last one I have to move. The vending machine weighs around 500 pounds. The ping pong table and air hockey table are north of 100 pounds and the arcade cabinets are around 80 pounds each. When moving the vending machine I use an appliance dolly and set it up a few feet from the back of our van. I then set down a couch cushion to absorb the impact of the fall. I lower the machine down on its side as far as I can, then pull my fingers out of the way and let it fall. Then shove it into the van. I did learn to put some boards on the bottom of the van so it doesn’t fall into the lip, making it harder to get out.
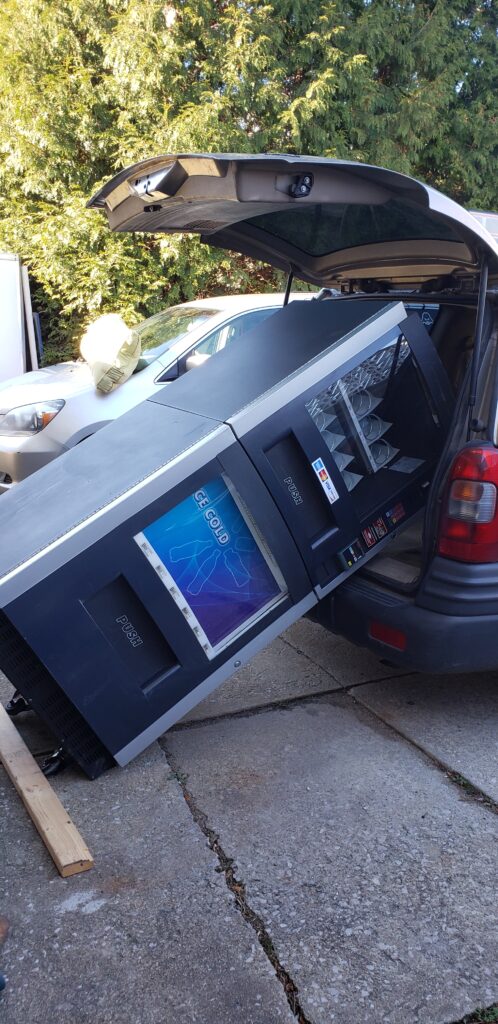
This is from a previous vending machine move, but same concept!
All in all this was a lot of heavy objects to move. The setups for the equipment varied in difficulty as well. The arcade machines take around 45 minutes to an hour to set up, the air hockey table was under 30 minutes, and the basketball shooter took a bit over 2 hours. I spent a bit over an hour on the ping pong table.
Here’s the game room with almost everything in it!
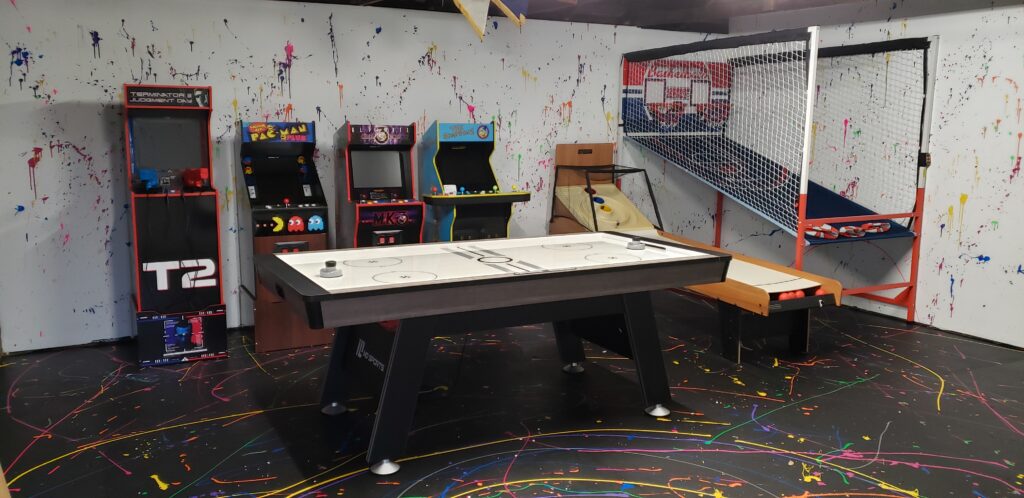
The vending machine is now in place next to the T2 machine and the ping pong table is on the front wall leaving an approx. 3′ walkway in front of the air hockey table.
Adjustments To The Plan:
I decided to deviate some form the initial plan shown in the spreadsheet above. Although I did purchase a Legends Ultimate Arcade machine (on sale for $250, from MSRP of $599!) I decided for now to keep it at the house because everyone is enjoying playing it.
I also have not set up the foosball table and elected to keep the ping pong table in the full table configuration instead of setting it up at half court. I do not want guests to move the ping pong table around and potentially injure themselves, so I needed to leave it fully down, which took away the real estate for Foosball. In the future we may remove the ping pong table as it eats a third of the room and put the Foosball table and more arcade games in.
Adding Access:
We added a key code lock to the garage, just as we have on all the units. This code is given to all the guests. We will probably change this roughly every month. We also will be installing cameras inside the arcade, as well as in the laundry area and parking area. We added a simple list of rules as well:
- Clean up after yourself
- Turn off the machines when done using them to conserve electricity
- Game room closed from 10PM to 8AM to be respectful of other guests
Primary Benefits:
The primary benefit of this game room is to separate us from other listings. When we went to stay in Florida for a week one of our criteria was a game room. The place we stayed at had 2 or 3 items in the garage for the kids to play with and that was enough. This epic game room will help people who are on the fence choose to book with us. For an all in cost of around $2,000 This game room will be well worth it. A 20% return would be $400 of extra bookings in a year, across the 4 units. I think we will manage that, that’s about 3 nights out of 1,460 available.
Additional Benefits:
It gets the final vending machine and the roll a score out of our garage! Our garage has been jam packed forever. We recently sold a vending machine and parted out another one, leaving just this one. Getting these 2 massive items out of our garage will be a big win.
Of the 2 long term rentals, our oldest son’s biological dad lives in one of them. He takes care of the lawn and snow removal for the property and so far this was been extremely helpful to us and to him. Our oldest frequently stays the night over there and having this game room will be a fun activity for both of them.
In the event that we ever want to get rid of the game room all of the work we did to the space puts it in striking distance of being fully climate controlled. 400 square feet of climate controlled storage space should be able to be separated into 2 200 sq foot spaces rented in our market for $200/mo each. I don’t plan to go that route, but its an option. After subtracting $100/mo for climate control on average we would have $3,600 in total net income. At a 13% cap rate this space would add $27,000 in value to the property.
We also got all of the equipment on such good deals that we could resell anything we chose to get rid of for what we paid for it.
Estimated Usage:
With 4 Airbnb units, even during peak season it is likely we will have a total of around 10 people staying at the same time. (2 of the 4 units are studios) Most likely the vast majority of the time this place will be empty. The size of this place makes it so you could actually have 10 people using different stations all in there at the same time. The odds of that are of course low. I do plan to put out surveys to ask people if: They used the arcade and if so what they liked best and what could be improved. I don’t think we will have issues with too many people or not enough space.
During slow times I can also take our kids over there to play as well once in a while.
What do you think of this arcade? Would you be more likely to stay here based on the arcade?
Leave a Reply