How To Make The Best No Bake Cookies
Since I was a little kid my mom has made amazing no bake cookies. She had an old cookbook that the recipe was in and about 5 years ago I got the recipe from her and started making my own, with a few slight changes. Virtually everyone loves these cookies. I make them at least once an outage for my crew at work. The great thing about these cookies is that they are extremely inexpensive and easy to make.
What You Need To Make The Best No Bake Cookies:
Time: 20 minutes
Cost: $10
Ingredients:
- Sugar: 2 cups
- Milk: 1/2 cup
- Butter/Margarine: 1/4 cup
- Cocoa: 1/3 cup
- Vanilla Extract: 1 tsp
- Peanut Butter: 1/2cup
- Oats: 2 3/4 cups
The ingredients are fairly simple, but balancing them perfectly is the key to making the best no bake cookies.
You will also need a large pot, a couple cookie sheets, wax paper, and of course ample fridge space.
Step 1: Kitchen Prep:
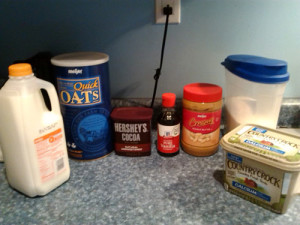 A clean kitchen is necessary for any cooking endeavor. The counters need to be cleared off and the sink empty before begining. As always wash your hands before handling any ingredients/food products.
- These cookies need to go into the fridge once they are laid out, so make sure your fridge has plenty of room for the cookies. You will also need cookie sheets covered in wax paper to form the cookies on. These should be laid out before you start anything.
- Round up the ingredients: I’ve started a double batch of these cookies before and then found out I didn’t have enough oats. I ended up with cookies that didn’t have enough substance to them, they were too gooey and didn’t taste right. Having all the right ingredients is essential before making the best no bake cookies.
- Measure out the oats and peanut butter into a mixing bowl. By having these incredients ready to add, they will bond quicker with the chocolate.
Step 2: Making The Chocolate For No Bake Cookies
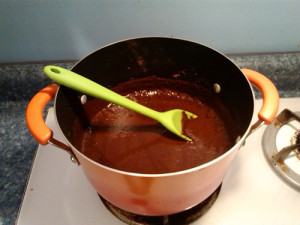 Measure out the sugar, milk, butter, and cocoa into the pot and mix. Turn on the heat to medium low and let it heat up, stirring occassionaly. I slowly increase the temperature to medium-high. After everything is a chocolate soup, let it boil for 1 minute.
While these incredients are heating up, start prepping the oats and peanut butter. And yes, I am using my wife’s Rachael Ray Cooking Set, which comes with a death penalty if I use any metal utensils on it. See Mrs C, I’m using the appropriate silicone spoon!
Step 3: Mixing The Ingredients
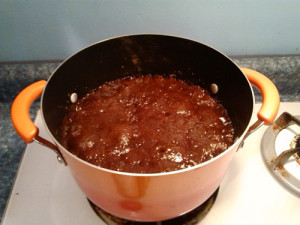 After the chocolate has boiled for 1 minute take it off the burner and immediately add the peanut butter and oats, stir thoroughly. It is important to allow the chocolate to fully boil for that full minute. I also slowly step up the temperature as well. I start out at low heat, then as the sugar melts I slowly increase the temperature to medium, then to high when everything is fully mixed in order to start boiling. After the peanut butter and oats are fully mixed in add in the vanilla extract and continue stirring.
Step 4: Forming No Bake Cookies
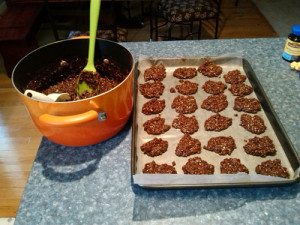 I use a 1/4 cup measuring cup to dish out the individual cookies. I lay them out in a grid based on the size of the pan to maximize space, while leaving enough room to ensure they won’t form together. As each baking sheet fills up I put it in the fridge. The cookies aren’t uniform in shape and size, but its the taste that matters. Typically it takes around 4 hours for them to form into cookies, but if you use less oats in the mix to make a more chocolatey cookie it is best to let them sit overnight.
Step 5: Clean Up:
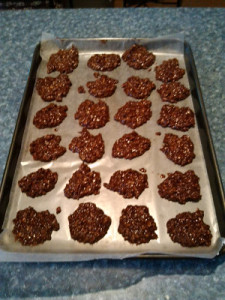 One of the keys to making the best no bake cookies is to leave a little bit of the mix left in the bowl. This is freakin delicious, after all, the cook should be rewarded for making the best no bake cookies right?
After finishing off the remaining batter, clean up all the dishes. This process produces several dishes that need to be cleaned, and cleaning them quickly makes them much easier to clean, as the chocolate will start to harden to the sides if left on the dishes. Mrs. C.’s pretty Rachael Ray Pans are not dishwasher safe, so I need to clean those by hand. I can make a double batch of chocolate no bake cookies in one pot, but if I am making 2 double batches I clean the pots and other dishes in between.
Step 6: Waiting and Testing
By FAR the most difficult part of the whole process. The cookies need around 4 hours in the fridge to form. They should be kept refridgerated. Making the best no bake cookies is a difficult prospect. If the ingredient amounts are off balance just a bit, you can end up with dry crunchy cookies or a gooey mess. Properly formed cookies should be moist enough to bend, but dry enough to separate from the wax paper.
Step 7: Transporting (Optional)
When I bring cookies into work, I leave them on the wax paper and transfer the wax paper sections into a disposable container. I then tape the lids on because the weight of the cookies will cause the lids to pop off. I make sure I produce enough cookies for everyone to have at least 3. Typically I make cookies for over 30 people.
Cost Breakdown:
The recipe for a single batch makes around 25 cookies. When making cookies for work I produce 2 double batches, resulting in around 100 cookies.
I tend to buy most of my ingredients in bulk, which drives the unit price down, but also increases the total out of pocket cost. For example I bought 80 oz of peanut butter even though I only needed 17 oz for these cookies. The vanilla is another expensive ingredient. Most of the time you are hard pressed to find real vanilla under $10 for an 8 oz container. I picked up 16 oz of real vanilla from Wal Mart’s online store for just over $6. You can also use the immitation vanilla flavoring which is much cheaper, and there isn’t a huge difference in taste. Bottom line is for just under 10 bucks it’s possible to make 100 delicious cookies. The only bad thing about these cookies is that it is difficult to stop eating them once you start.
Perfect No Bake Cookies:
Practice makes perfect. I have made these dozens of times and a slight difference in the measurement of the oats or the peanut butter can result in dry crumbly cookies, or cookies so gooey you need a fork to eat them. The measurements laid out above have worked best for me to result in no bake cookies that can easily separate from the wax paper, but are still very chocolately and gooey instead of crumbly.
In the future I plan to experiment with my recipe to add coffee to them as well, both for the taste and the caffiene.


Leave a Reply