How I Ran Electricity To My Pole Barn 100 Amps!
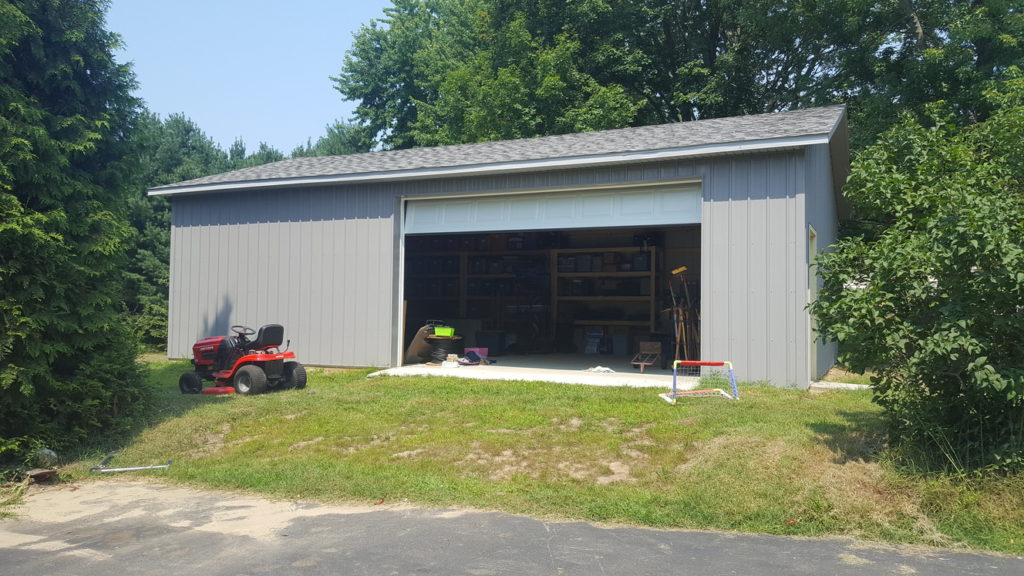
We ordered a pole barn in June of 2020 and it was finally constructed in December, however due to the Michigan winter we couldn’t get concrete until late March. A pole barn is great and we really needed the space. We don’t have a basement and with 6 people living in this 1800 sq. ft house we were bursting at the seams. Several years ago we bought one of those Rubbermaid Outdoor Storage Sheds, and that worked well for about 5 years but we really needed more space. Our 24 X 36 pole barn certainly provides that. In addition to the space to store stuff, it is also a place to work on vehicles, to build stuff, and maybe to run some of our business ventures out of. One thing is for sure, I need power out there!
Overall this project took me 2 weeks working intermittently. By far the majority of the work was digging the trench.
My original plan for running electricity to my pole barn:
Originally I was planning to run a single 12/2 underground rated wire off of a 20 amp breaker to the pole barn. This could provide lighting and allow me to plug in most tools I use. I did this at our first house about a decade ago. While planning out this project I found out that the price of wire had greatly increased. A 250 foot roll of 12 2 underground rated wire costs around $200. I decided to continue on because I really needed the power and $100 extra bucks shouldn’t stop me.
Digging The Trench:
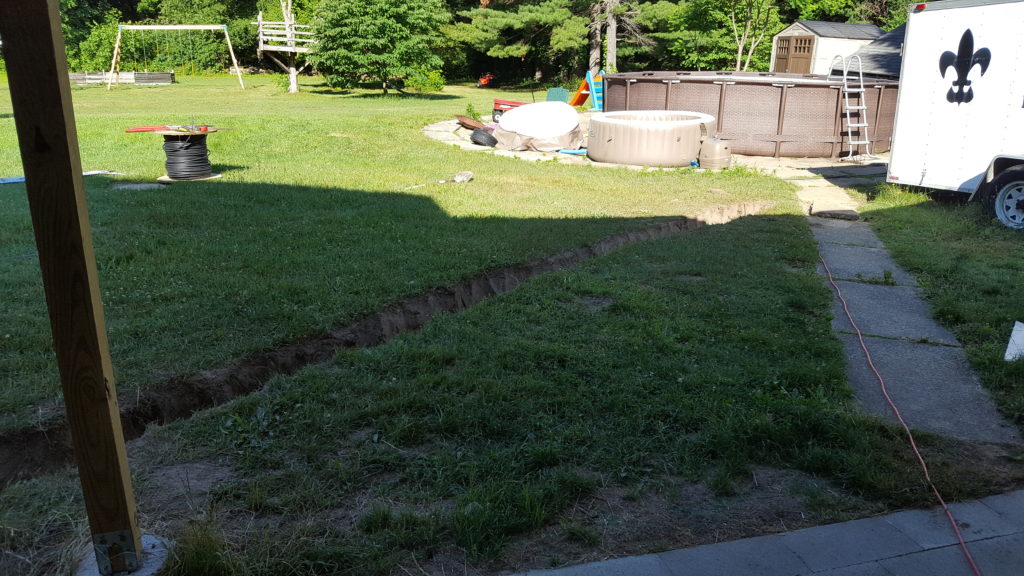
Regardless of the cost I needed power. Code requires a deep trench for power and I started digging. I have just over 100′ of total distance I needed to dig a trench between the pole barn and my house. For code I either needed to go 18″ deep or 12″ deep with 2″ of concrete on top of the wires. Going deeper than 12″ seemed to be exceedingly difficult, the ground was harder and my trench was getting narrower. I decided I would go with concrete. It took me several days, with help from the kids, to dig this trench.

I know, I’m a dirty redneck and my yard is a mess. 😉
I could have rented a trenching machine, but I had a few challenges. First of all I’m a cheapskate and didn’t want to spend the money. I also don’t have a trailer and really didn’t want to lift a 200+ pound machine in and out of my van. Finally there is already power ran from the house to the pool area and I have no idea where the wire is or how deep it is, just that it 100% crosses my path. With a trencher I would certainly have cut this wire.
Adjusting The Wire Size:
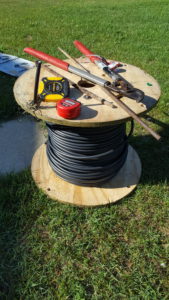 While working on the trench I decided that by far the trench itself is the biggest investment, worth far more than the cost of the wire. I began researching wire sizes and options. I decided to go with the least expensive option for moving the most amount of power. This was going with 240 Volt 100 Amp service to the pole barn. 1000 feet of 1/1 Aluminum USE wire, rated for underground burial. I needed 140′ per wire and needed 4 wires; 2 hots, a neutral, and a ground. I paid $373 for the 1,000 foot roll and used 560′ of it, meaning the cost of the material I used was $208, comparable to the same cost of just running a single 12/2 wire. Cost per foot ends up at $1.48 across 4 wires. This is also much less expensive than buying the 4 wires bundled together. UPDATE January 2024: This wire fluctuates greatly in price. It has varied between $515 and $999 in the last 90 days.
The wire came on a large wooden spool and to get my wire lengths right I put 2 stakes in the ground 140 feet away from each other. I then wrapped the wire around the first stake and unrolled until I got to the 2nd stake. I cut the wire with lopping shears. I then labelled all the wires by wrapping color coded electrical tape on them approx. every 6 feet. White for neutral, green for ground, red for hot, and I left 1 without tape for my 2nd hot.
With 100 Amp 240V service to my pole barn not only can I run lights and standard electrical plugs, but I can also run a welder, heaters, and in the future charge an electric vehicle out there! The 1 gauge 194 degree Aluminum wire is actually rated for 115 amps, so I could up my breaker from 100 amps to 115 amps.
I also ran a 200′ foot heavy duty CAT6 direct burial cable because it was inexpensive and in the future I may want a stronger connection in the pole barn than the relatively weak WIFI signal I get out there.

Penetrations:
 To run wire between 2 buildings you must go through 2 buildings. When we built the pad for the pole barn I installed a 1 1/2″ conduit to move power wires through. (Side note: when having a pole barn built and they say you can save money and time on the schedule doing the pad yourself…don’t do the pad yourself, it ain’t worth it.) This conduit drops through the concrete floor, down roughly 2 feet and then out the side of the building another 8 feet. At the time I was planning on only using a single 12/2 wire. When I went to run the 4 1 gauge cables through this conduit it did not go well. I couldn’t tie them to a rope and pull up through the conduit as planned, and I couldn’t just shove them through. Rather than feeding 10 feet into the pole barn I had to feed 130 feet from the pole barn down through the conduit. I electric taped all 3 wires (plus a Cat6 wire) together and pushed them through the conduit. Once I got it started I had 2 kids help by pulling the wire through on the outside. We got it done, but it was a pain. We then set the wire in the trench and the end result was I had 10′ in the pole barn as desired and the rest in the yard. Unfortunately that was the easy penetration!
Side note: If putting conduit in a floor for an out building run 3 or 4 2.5″ conduits. You can put caps on them if you don’t use them! It’s way easier to over engineer on the front end than to trouble shoot on the backend.
 My house is designed fairly odd. It’s a trilevel house with a crawlspace. I planned to feed the wires through the house at the same point where our waste pipe for the septic comes through at. I figured the concrete had already been broken here, so it was probably the point of least resistance. The sewer pipe runs under a breezeway that has 3 steps, so I actually can’t physically get to the location of the penetration from inside the house, I have to break through from the outside. I dug up to the sewer pipe and was ready to go. From the inside it looks like half the cinderblock had been smashed so I just need to break through a single wall of a cinderblock and I’m home free! Boy was I wrong.
 I started out just hitting the wall with a hammer. Then a sledge hammer. Then a sledgehammer and chisel. I got a couple inches in and realized this is more than just a single cinderblock wall. Years ago my dad gave me a corded Milwaukee drill and I figured I would need to drill through the wall. The problem is, I need a big hole! I bought a 1″ diameter X 18″ drill bit from Lowes. I decided to go with 18″ because I didn’t want to end up short. Here’s a similar drill bit on Amazon 1-1/8 Inch x 18 Inch SDS Plus Rotary Hammer Drill Bit. This hammer drill was a champ. I had to drill 2 holes for the wires, and the wall was every bit of 17″ thick! It was a heck of a workout to get through the wall. I took several breaks, both for me and the drill. I think the drill was not designed for this level of work, but it made it happen! I then pushed 2 wires through each hole. The stiffness of the wires allowed them to get pushed through to the accessible portion of the crawl space. I then had the kids help me pull them through to get to the panel.
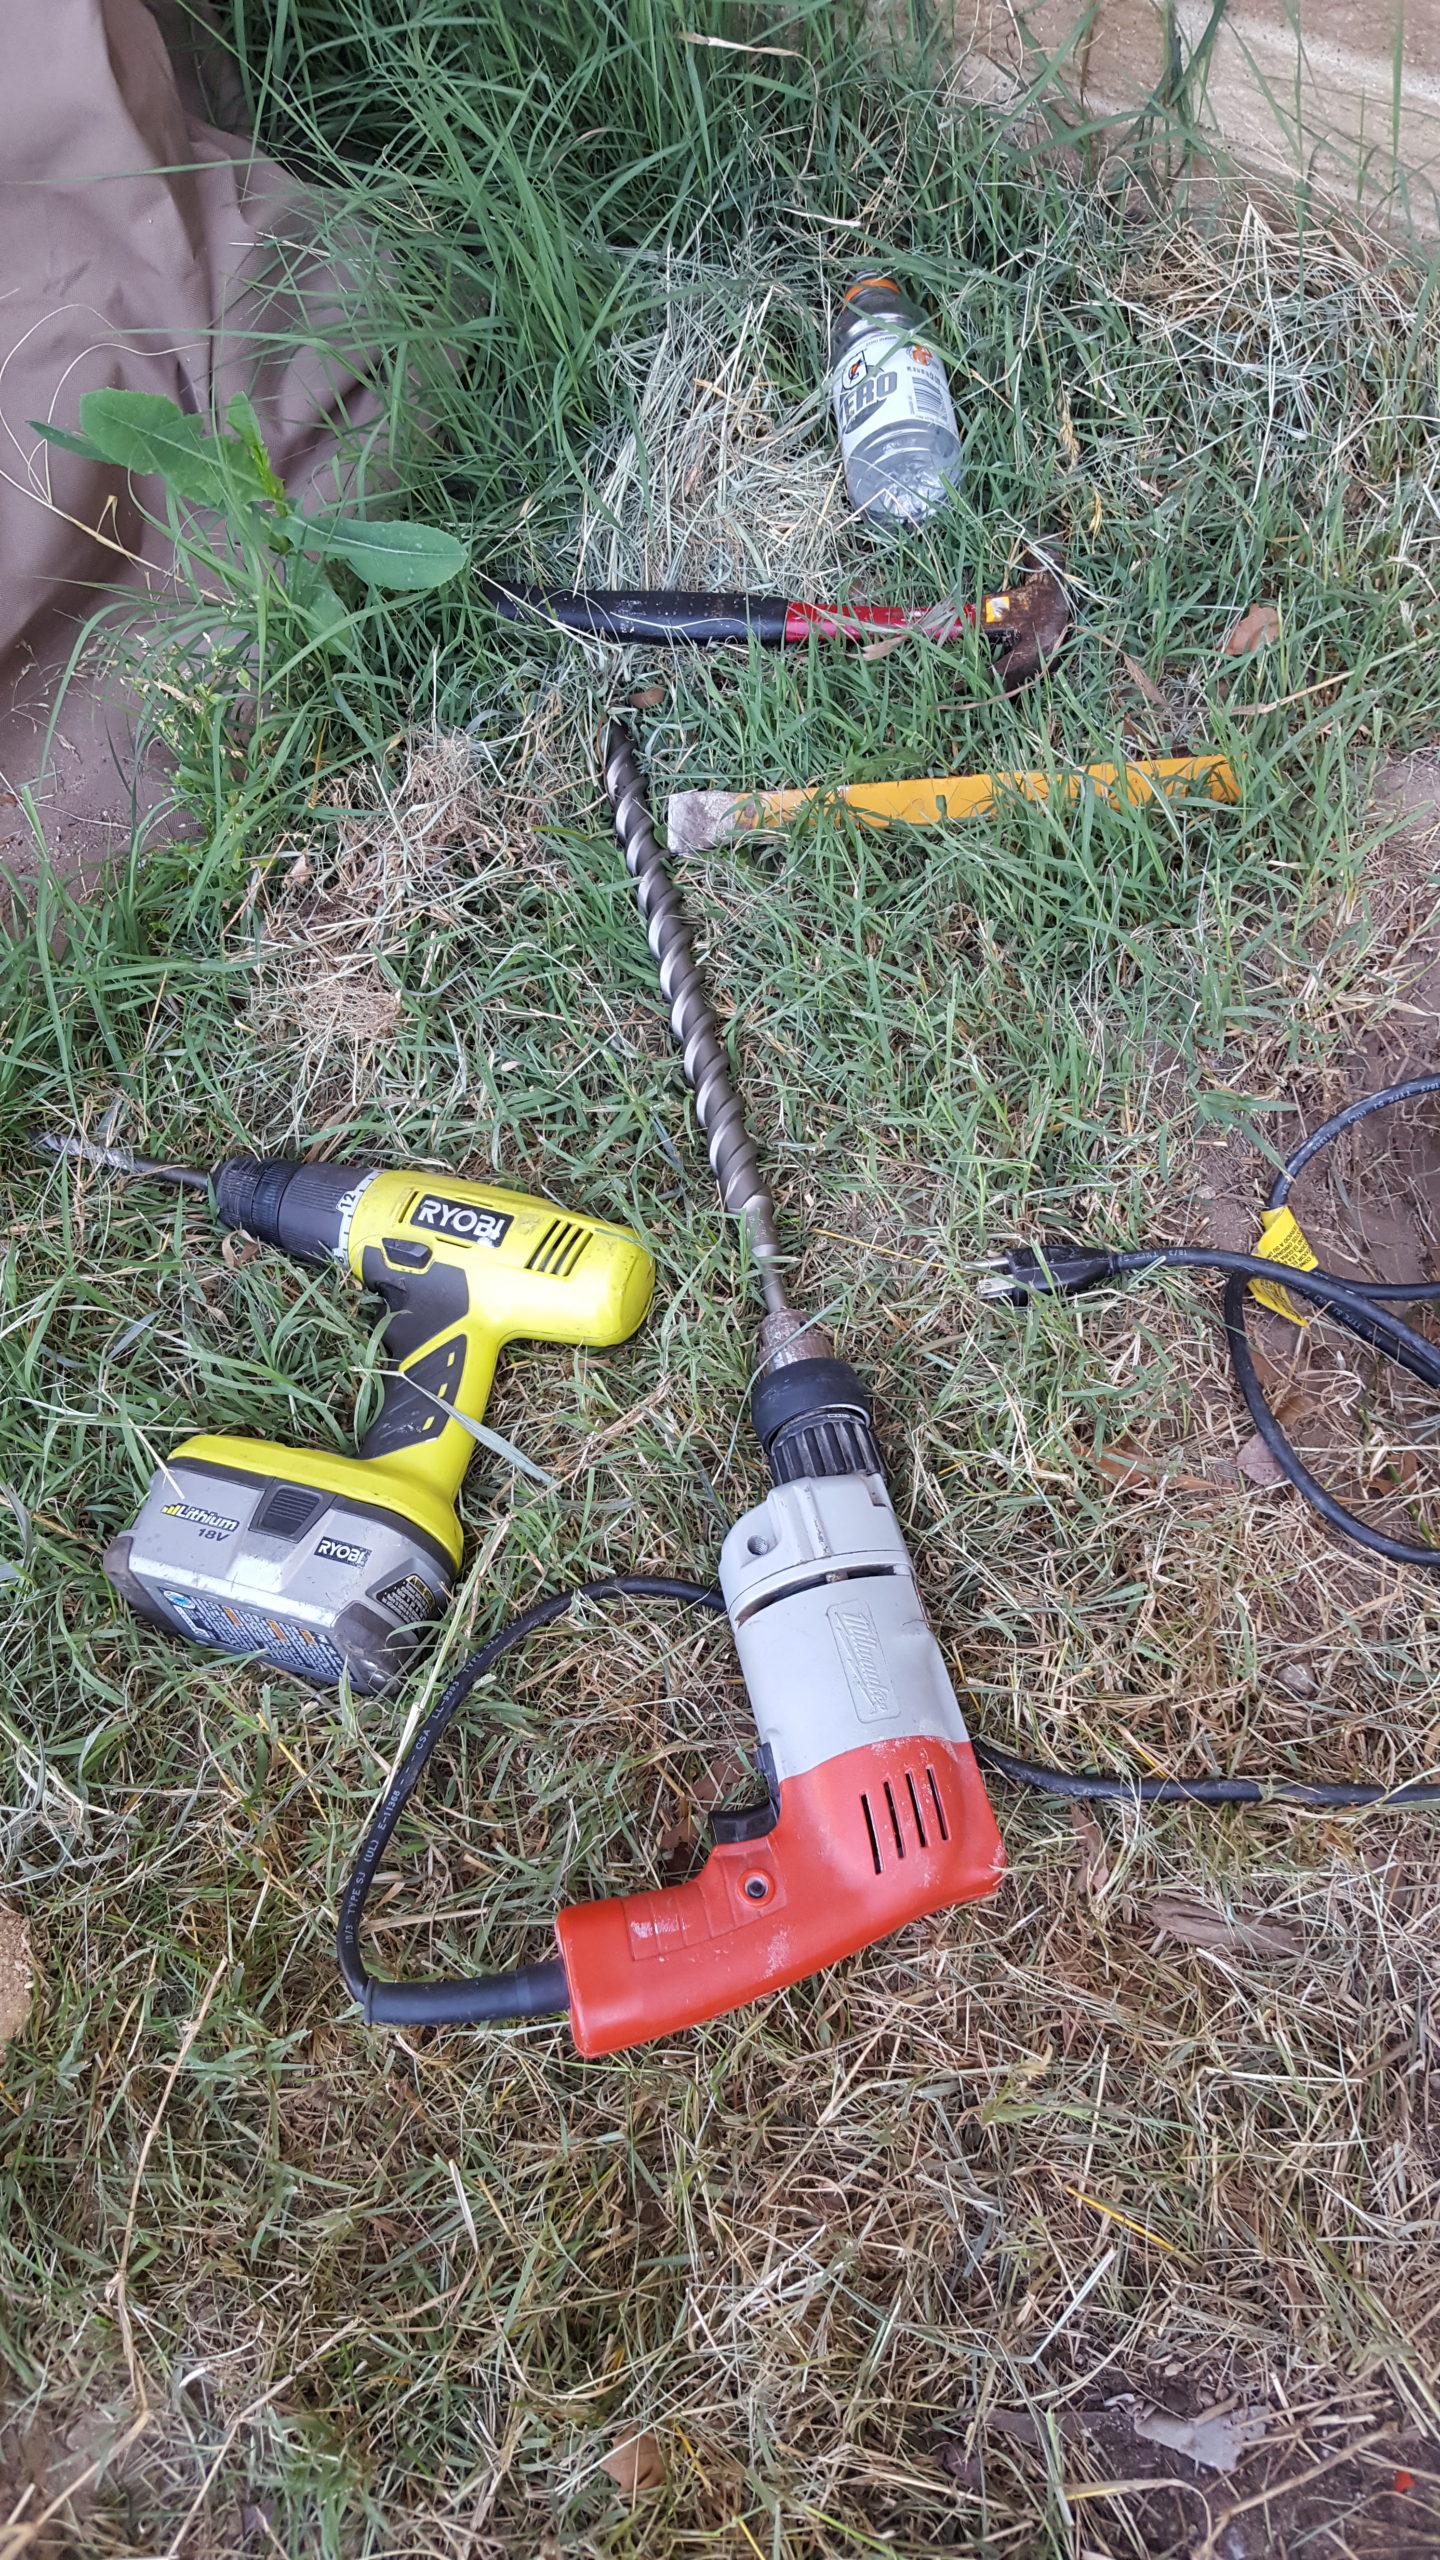
I also ran a 12/2 underground rated wire through the penetration for an exterior outlet just outside of the house. This fit with 2 of the large wires and was a request from Mrs C. We don’t have a lot of exterior outlets, so this provided substantial utility.
Setting up the Electrical Panel:
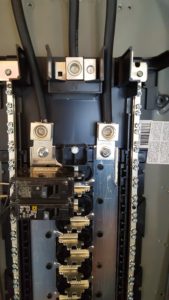
I checked several charts and the correct sized breaker for this wire was 115 Amp. It’s also important to ensure that the connectors and breakers you buy when using aluminum wire are rated for aluminum wire. I bought a 100 Amp breaker ( you can always go lower) because that’s what I could get immediately. The wire fits in the 100 Amp breaker and I put it in an empty 2 pole location on my panel. (OK I did some beaker rearranging to make it the top spot.) Manipulating 1 gauge wire isn’t easy, nor is stripping it. I stripped the wire with a standard Stanley knife.
 OK, so I got the 2 hot wires attached to the breaker but the ground and neutral are way too big for the neutral bar! they make a special adapter for this and it only costs a couple bucks. They come in a 2 pack at Home Depot. You screw in the small hole to the neutral bar and the 1 gauge wires get squeezed into the large hole. All set on this end!
 In the pole barn I bought a new electrical panel. My understanding is since it is in a separate building it needs a main breaker, which I have not gotten yet. This main breaker would essentially serve as a light switch, since the wires are protected by the breaker in the house. Currently I have 2 circuits set up on this panel. I bought a large panel on the advice from my dad that the incremental cost is well worth it, and while I only need a couple circuits now, over the next 50 years that could easily change. Buying a larger panel cost me around $30 more than a smaller panel.
When connecting the wires to the panel it is fairly straight forward. The 2 hots go to the 2 hot receptacles, the neutral to the neutral, and the ground to the ground. IMPORTANT: In sub panels the neutral and ground bars MUST BE SEPARATED. It’s OK for them to be connected at the main panel, but not on a sub panel. Also to connect these wires on the panel I bought required a size 9 Allen wrench, while all of mine were even numbers, so trip 47 to Home Depot.
Filling In The Trench: I filled in the trench in a series of 6 steps:
- Add some dirt. I started with the clods of turf from the top of the soil and put those on top of the wires upside down.
- Add concrete: I then added my 2″ of concrete to meet code. I mixed my concrete in a wheel burrow and poured directly. I did use some old pavers as well for bulk fill and poured concrete on top of it.
- Add more dirt: I then added a couple inches of dirt on top of the concrete.
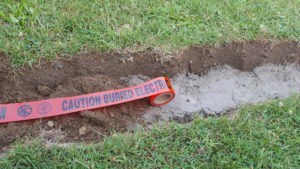
- Add Danger Tape: I added 3″ Danger tape that states “Caution Buried Electrical Cable“.
- Add more dirt: I then filled dirt in the trench to the top and packed down
- plant grass seed: I raked in grass seed to the entire trench. By next spring it will be like it never happened.
Wiring the Pole Barn:
I ended up buying a 250′ roll of 12/2 underground wire anyways. I used 14/2 that I had left over from previous projects for the lights, but I ran out of 14/2 and the underground was less expensive that the normal yellow 12/2.
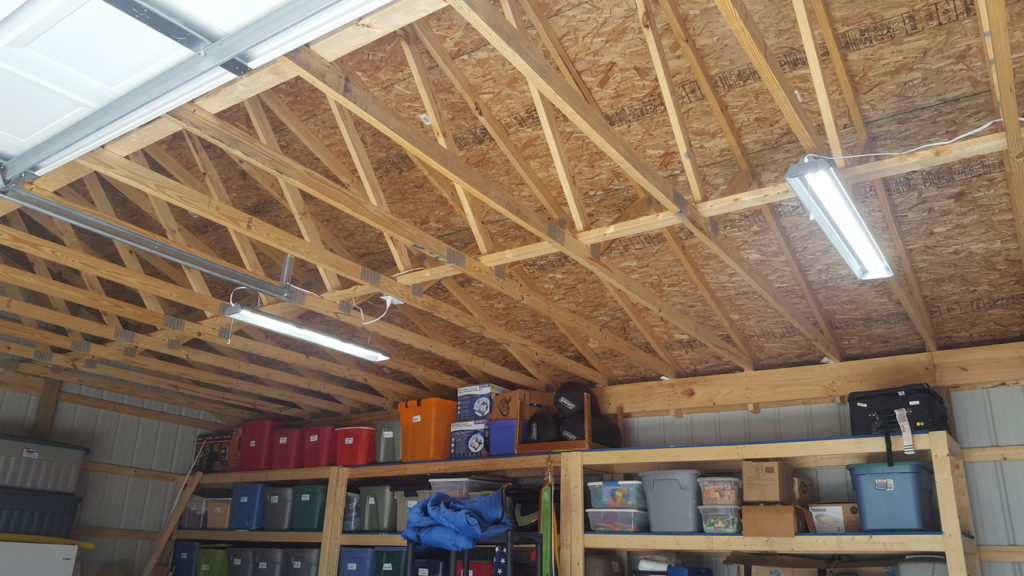
I ran 1 15 amp breaker with 14/2 wire for lighting. I ran the wire straight up and across the overhead, then down to a light switch at the man door. The wire then runs up into the middle of the overhead and I installed 2 sets of overhead outlets to connect LED shop lights to.
I ran 1 20 amp breaker for the majority of the electrical outlets with the 12/2 wire. I installed a total of 8 outlets across half of the pole barn. I will run a separate breaker to run another 3 outlets along the opposite wall. The only area without outlets closely available will be the wall with the built in shelving we installed.
Project Costs: I did not save all my receipts, so this is roughly correct:
- 560′ of 1 gauge AL wire: $208 (Had to pay $373 for 1,000 ft roll)
- 100 Amp Breaker: $70
- Breaker Panel: $90
- Concrete 12 80# bags: $72
- 18″ long 1″ diameter drill bit: $50
- Multi Colored Electrical tape: $8
- Electrical Danger Tape: $8
- Connector Lugs for 1 gauge wire: $2
- 250′ 12/2 wire $189
- 10 boxes $10
- 10 outlets $10
- 10 outlet covers $5
- 2 LED Shop Lights $40
- GFCI outlet, outdoor cover, and conduit: $30
- TOTAL COST $792 + $165 unused wire = $957 total out of pocket
Future Plans:
I really want to do solar power in the future, but it’s expensive and I don’t want to roof mount it because
- 1. I don’t want to risk damaging my roof
- 2. it adds cost and hazard, and
- 3. I will need to replace my roof at some point and I really don’t want to have to do both at once.
I have about half an acre of south facing land next to my Pole Barn that could be great for solar power. I also found out that I can buy used solar panels online for about a tenth of the cost of new if I’m OK with them generating 10% power less than the label. I can buy 7.5 KW of solar panels DELIVERED for $1,800. Then I can buy an inverter and a significant battery for around $5K. I would first power my pole barn with it, and then work towards powering my house, going completely off grid. I know this would require both more panels and a bigger battery.
Theoretically I could install the panels, the battery and the inverter in a power shed next to the pole barn, then remove the wires going to the pole barn from the house. I would then run new wires from the inverter panel to the pole barn through the conduit, and Cap off the wires running from the pole barn to the house.
The next step would be once I have a large enough system to power the house, disconnect the main line power from the house, and connect the wires that used to go to the pole barn to the inverter, and then run the wires going to the house from the pole barn into the main power in on the panel.
Alternatively I could leave the main power connected and add a panel in the house for solar loads, and switch breakers from the main grid power to the separate solar powered breaker. I could leave heavy loads like the well pump and AC on the line power and transfer everything else over to solar.
This is all a ways off, but I think I can get there!
Update January 2024:
It’s been 2 and half years since I completed this project and would like to provide an update. Electrical work at least for me is something that I avoid doing. If a plug is in an inconvenient spot, the go to is to run an extension cord, rather than wire a new outlet to where you want it to be. I am very glad that I did “overkill” on installing outlets. Having outlets all around the pole barn and having outlets specifically right above my work bench are extremely handy. I have a double outlet right at the door where I put my air compressor.
I have not ran into an issue yet, but in retrospect I wish I had ran more dedicated circuits. In my kitchen all of the outlets are on a single breaker, and if someone starts the toaster while the microwave is going, the breaker pops. I have 2 circuits ran for outlets, and having a few more will certainly be helpful. The nice thing about a pole barn is all the walls are exposed so it isn’t too difficult to add new circuits.
Having this pole barn has been an absolute life changer. We have a family of 6 and our house has no basement. Having the pole barn has been especially useful with the amount of work we do rehabbing houses for storing materials, appliances, and tools. We tend to buy materials and supplies when they are on sale, which leads to having a large stockpile of stuff.
The electricity in the pole barn greatly increases it’s use. Just having the lights out there is big. I have used the pole barn for our air compressor, for charging all my battery powered tools, for my grinder, and for my table saw.
Solar power is getting much closer to happening. Our current electric bill averages around $200 a month and out utility is seeking another 9% rate increase. Being able to transfer some loads to solar over time will be a win. I haven’t had the cash available to do a project like this for the last couple years, but we are getting really close now.
Leave a Reply