How To Build a Cheap Tree House: My $300 Tree Fort
 Building a tree house had been on the to do list since we moved to our new house in 2011. I really wanted to build one for the kids, but building a tree house is a very labor intensive task and can be quite costly. $1,000 is usually a low estimate for building one, with prices ranging up into the 6 figures (yeah people are crazy!)
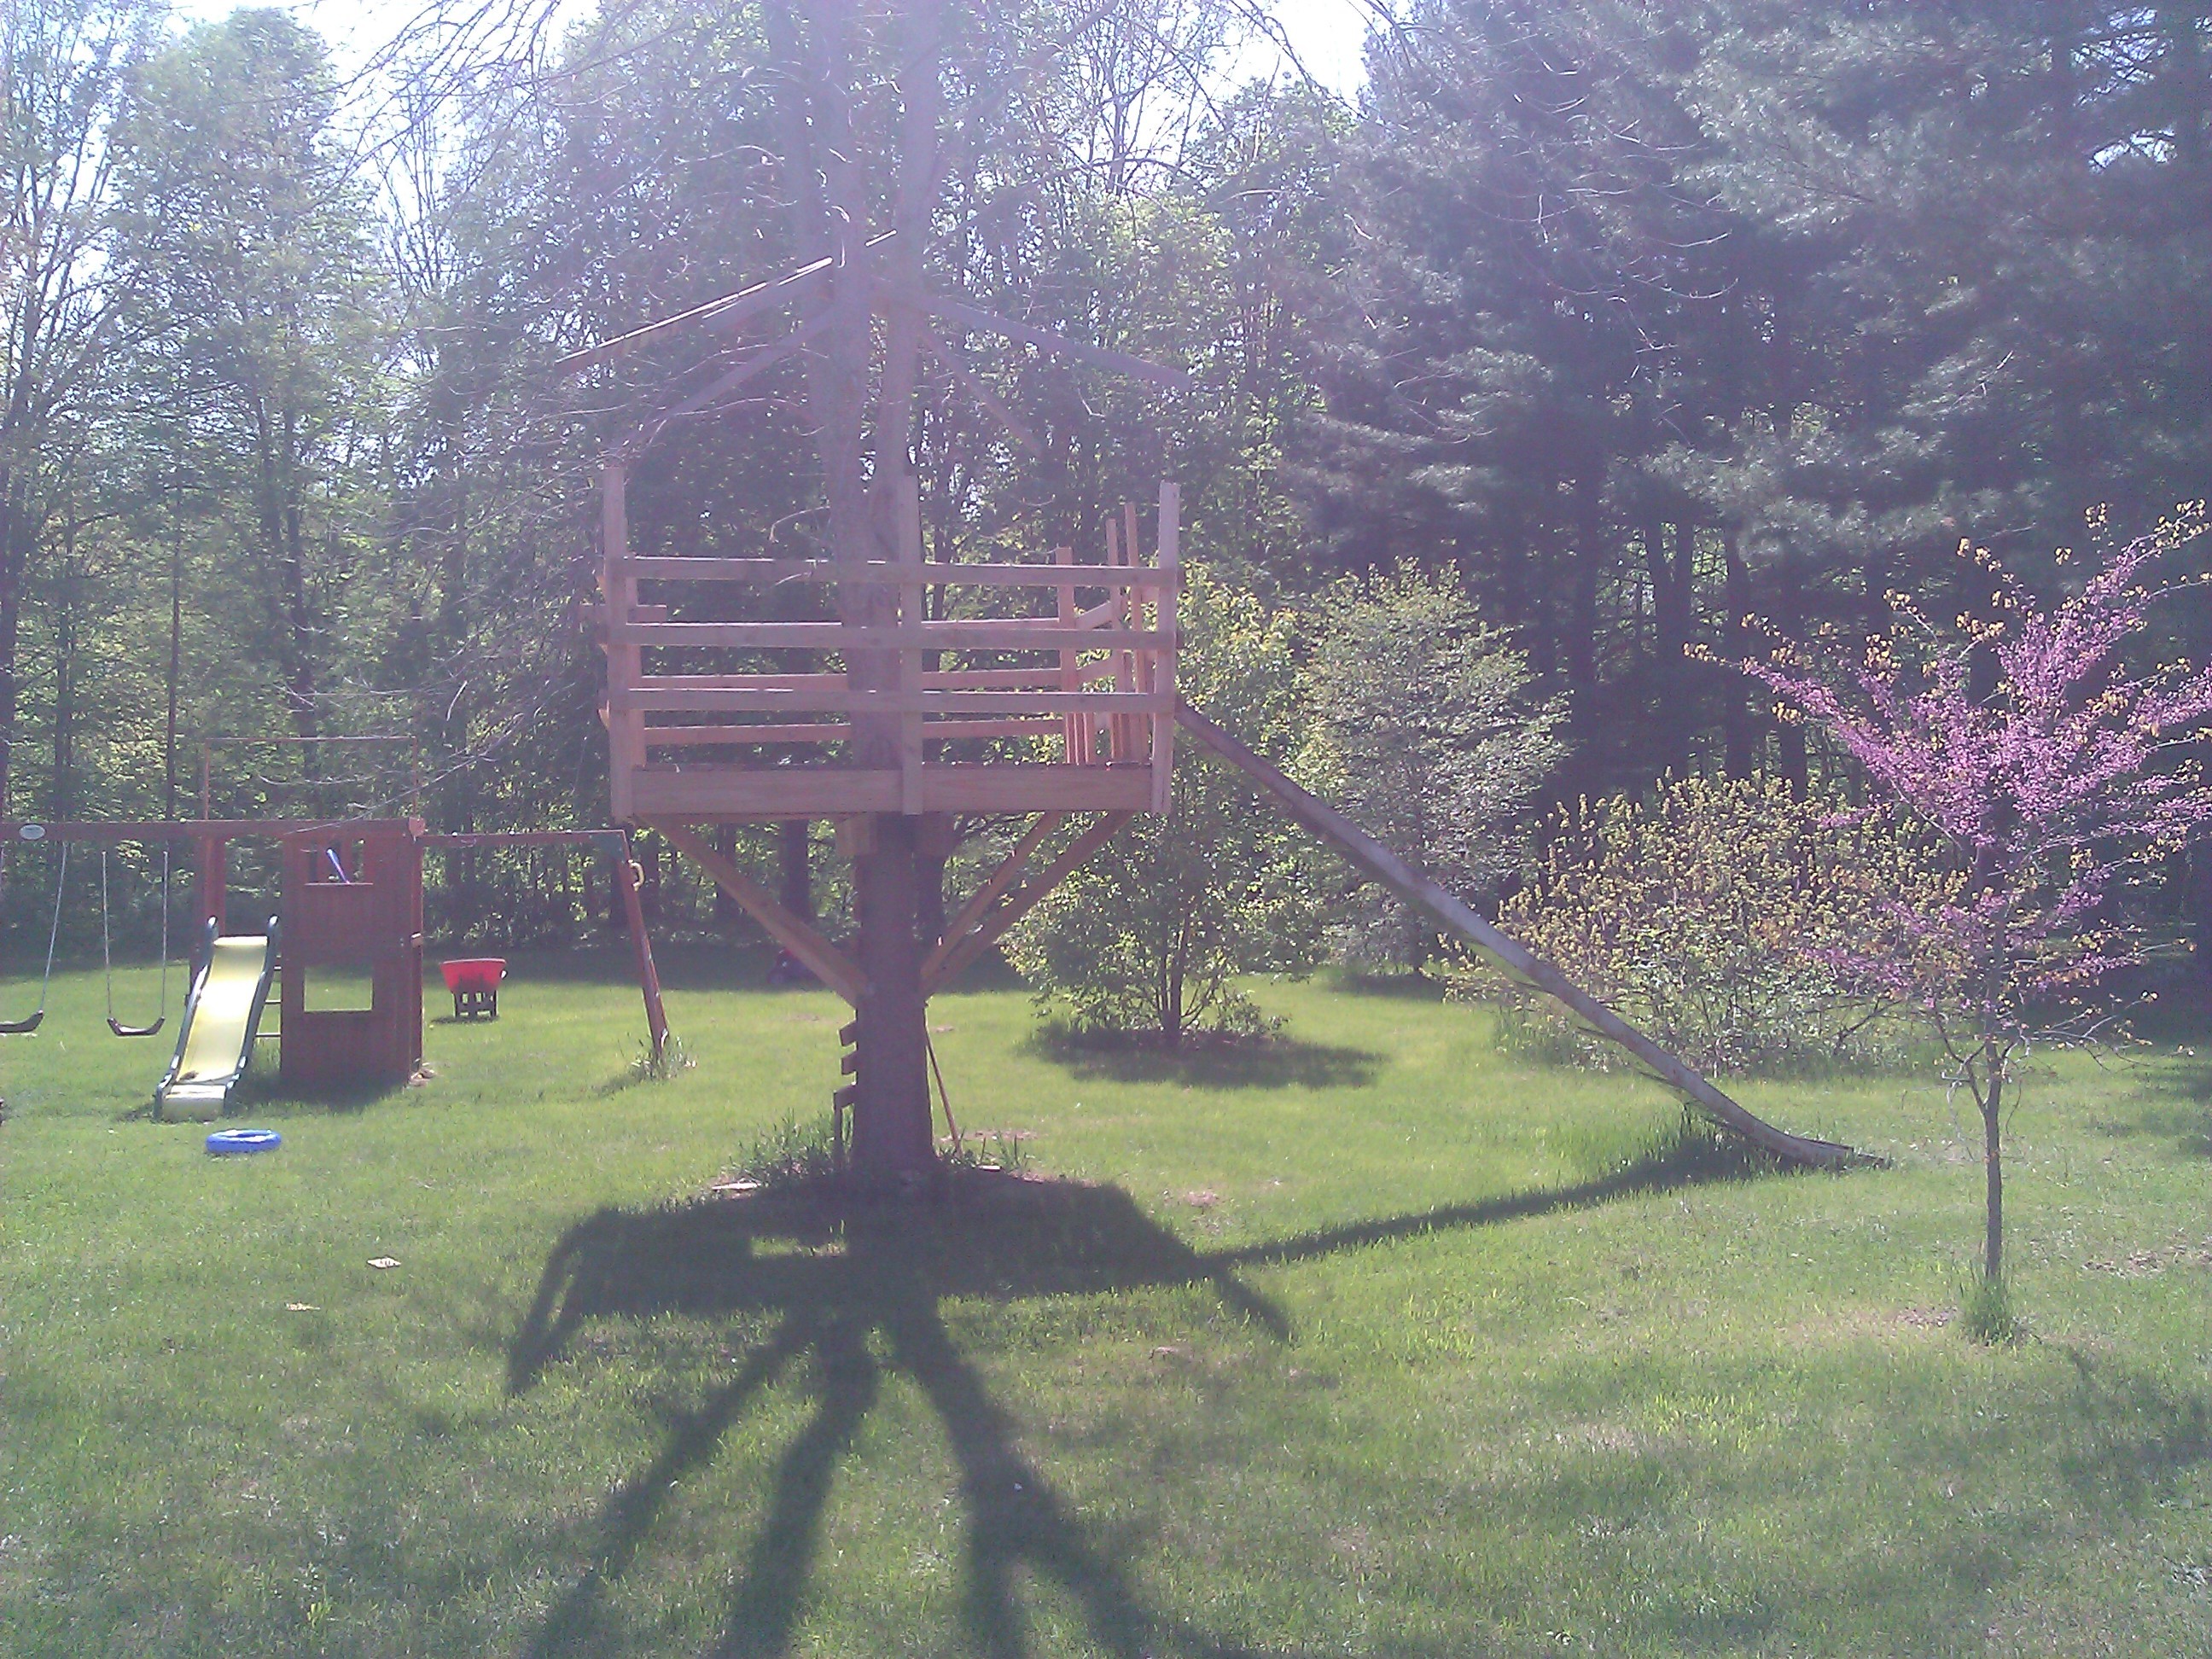
I originally wanted to build the tree house back in the woods at the treeline. It provided more privacy and shade for the kids and in the future I could connect multiple trees and it would look like Kashyyyk. Mrs. C. thought it would be better to build the tree house in the one tree centered in the backyard, because she wanted to be able to see the kids from the kitchen window. We built it in the center of the back yard ;).
How To Build A Cheap Tree House; Design:
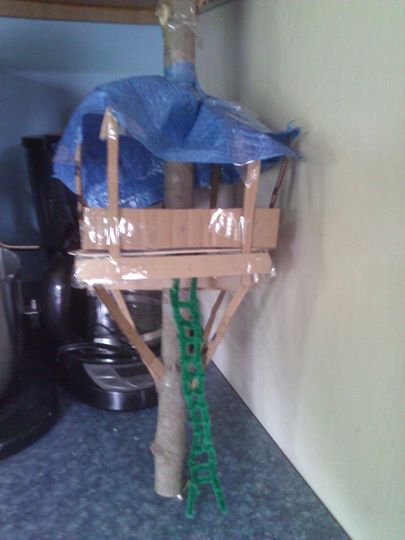 Before construction started on the tree house I looked up different designs online to figure out the best way to go about this. We went with a 8′ X 8′ platform design and built the base to be 7 feet off the ground. Before we got started I made some sketches, and then my youngest son and I built a model out of cardboard. This model showed exactly how many boards of what size we needed and how to best fit them together. I know this sounds a bit anal retentive, but had we not made a model I would have made several mistakes when constructing the real thing. The model allowed me to see in 3D what I was missing on paper. We ultimately did not make a tarp roof, although at some point it would be nice to have a fabric roof that appears to look like pirate ship sales. Another difference from the model and reality is the ladder. I originally wanted to build a rope ladder, but that was too difficult for some of the younger kids to use. The ladder in place now is simply boards screwed into the tree. Designing a model helped determine how to build a tree house without making a ton of mistakes.
How To Limit Expenses When Building A Tree House:
Wood is not cheap, I would say about $230 of the cost was in wood. The lag bolts were about $10 total and a few packs of screws ran about $30 total. I saved a lot of money by skipping walls and a roof, I guess this is more of a tree fort than a tree house, but it really doesn’t matter what you call it. I saved a bit of money on the wood too. We had an old picnic table that we were trashing and we were able to re-use the planks from it for some of the floor boards. Another area I saved money on was buying 16′ boards. At Home Depot the 16′ boards were not much more expensive than 8′ boards for the decking I used for the floor. By buying these and cutting them in half I saved probably $20 – $30. I already owned the tools needed, I got a refurbished 18V set of Ryobi tools a few years ago with a circular saw, drill, and reciprocating saw. These were the main tools I used.
The Slide:
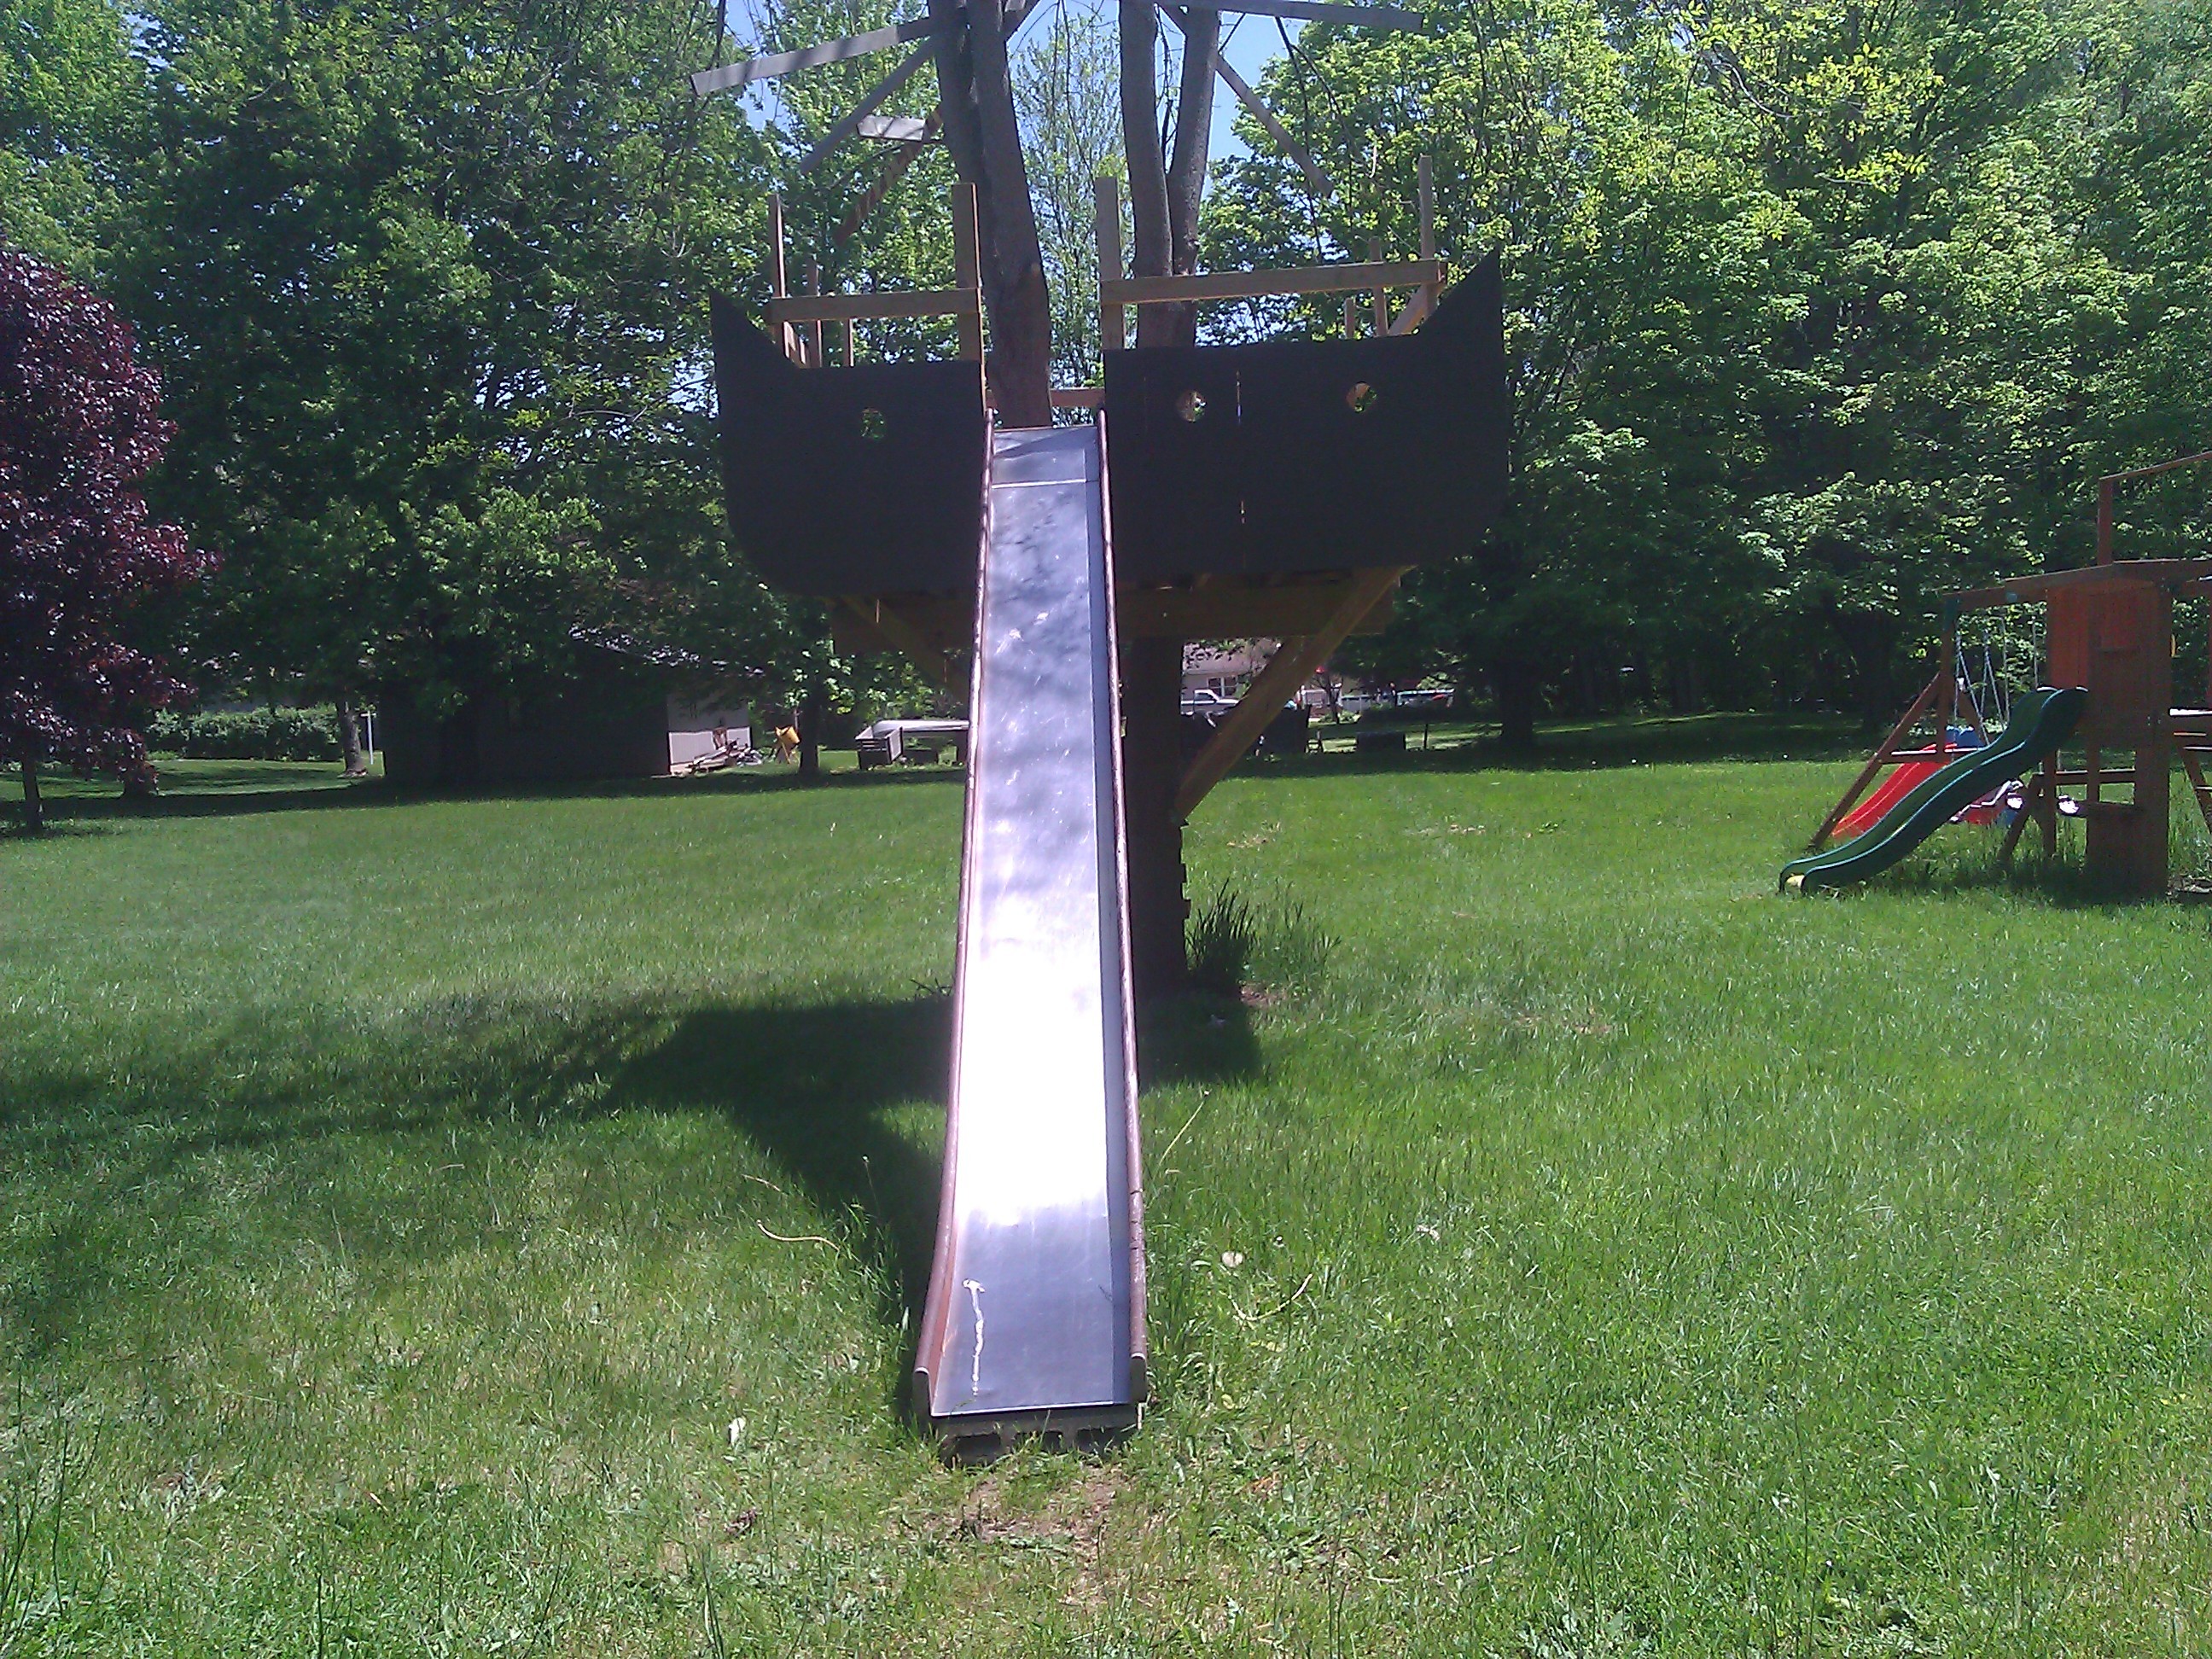 The biggest savings was on the slide. Try finding a slide for a 7′ platform. Metal slides are impossible to find new, and the cheapest plastic slides that fit a 7′ platform are the twisting turbo slides. These are not in the budget for me. Even used its hard to find one for under $300. I lucked out big time in finding our slide. We were taking a small load of metal to the scrap yard and when we went to leave saw this large metal slide sitting off to the side. I asked Mrs. C. to ask about it when she went in, and they told her it was for sale, for scrap price, so it would be $20. No way could I let that go!
We were in the minivan, and the back seats were out. This slide was longer than it appeared. Even pushing it in all the way to the dash it still stuck out about 6 feet out the back gate. We carefully took it a couple blocks down the road to my sister in laws house and unloaded it. I called a friend of mine who owns a portable toilet company and he brought out his large box truck and took it to the house for me.
I set the slide up, but it wasn’t at the right angle. You simply couldn’t slide down it off of a 7′ platform. I build a step up on the tree fort giving the slide an 8′ platform, and the slide works great now. It probably would work better off of a 9′ platform, but Mrs. C. is not comfortable with that. If I could do it all over again I would build the tree house on a 5 foot platform. I got EXTREMELY lucky with finding this slide. The vast majority of slides that are commercially made are 5 feet long. Amazon has these slides but for this particular build they aren’t large enough.
How To Build A Cheap Tree House; Construction:
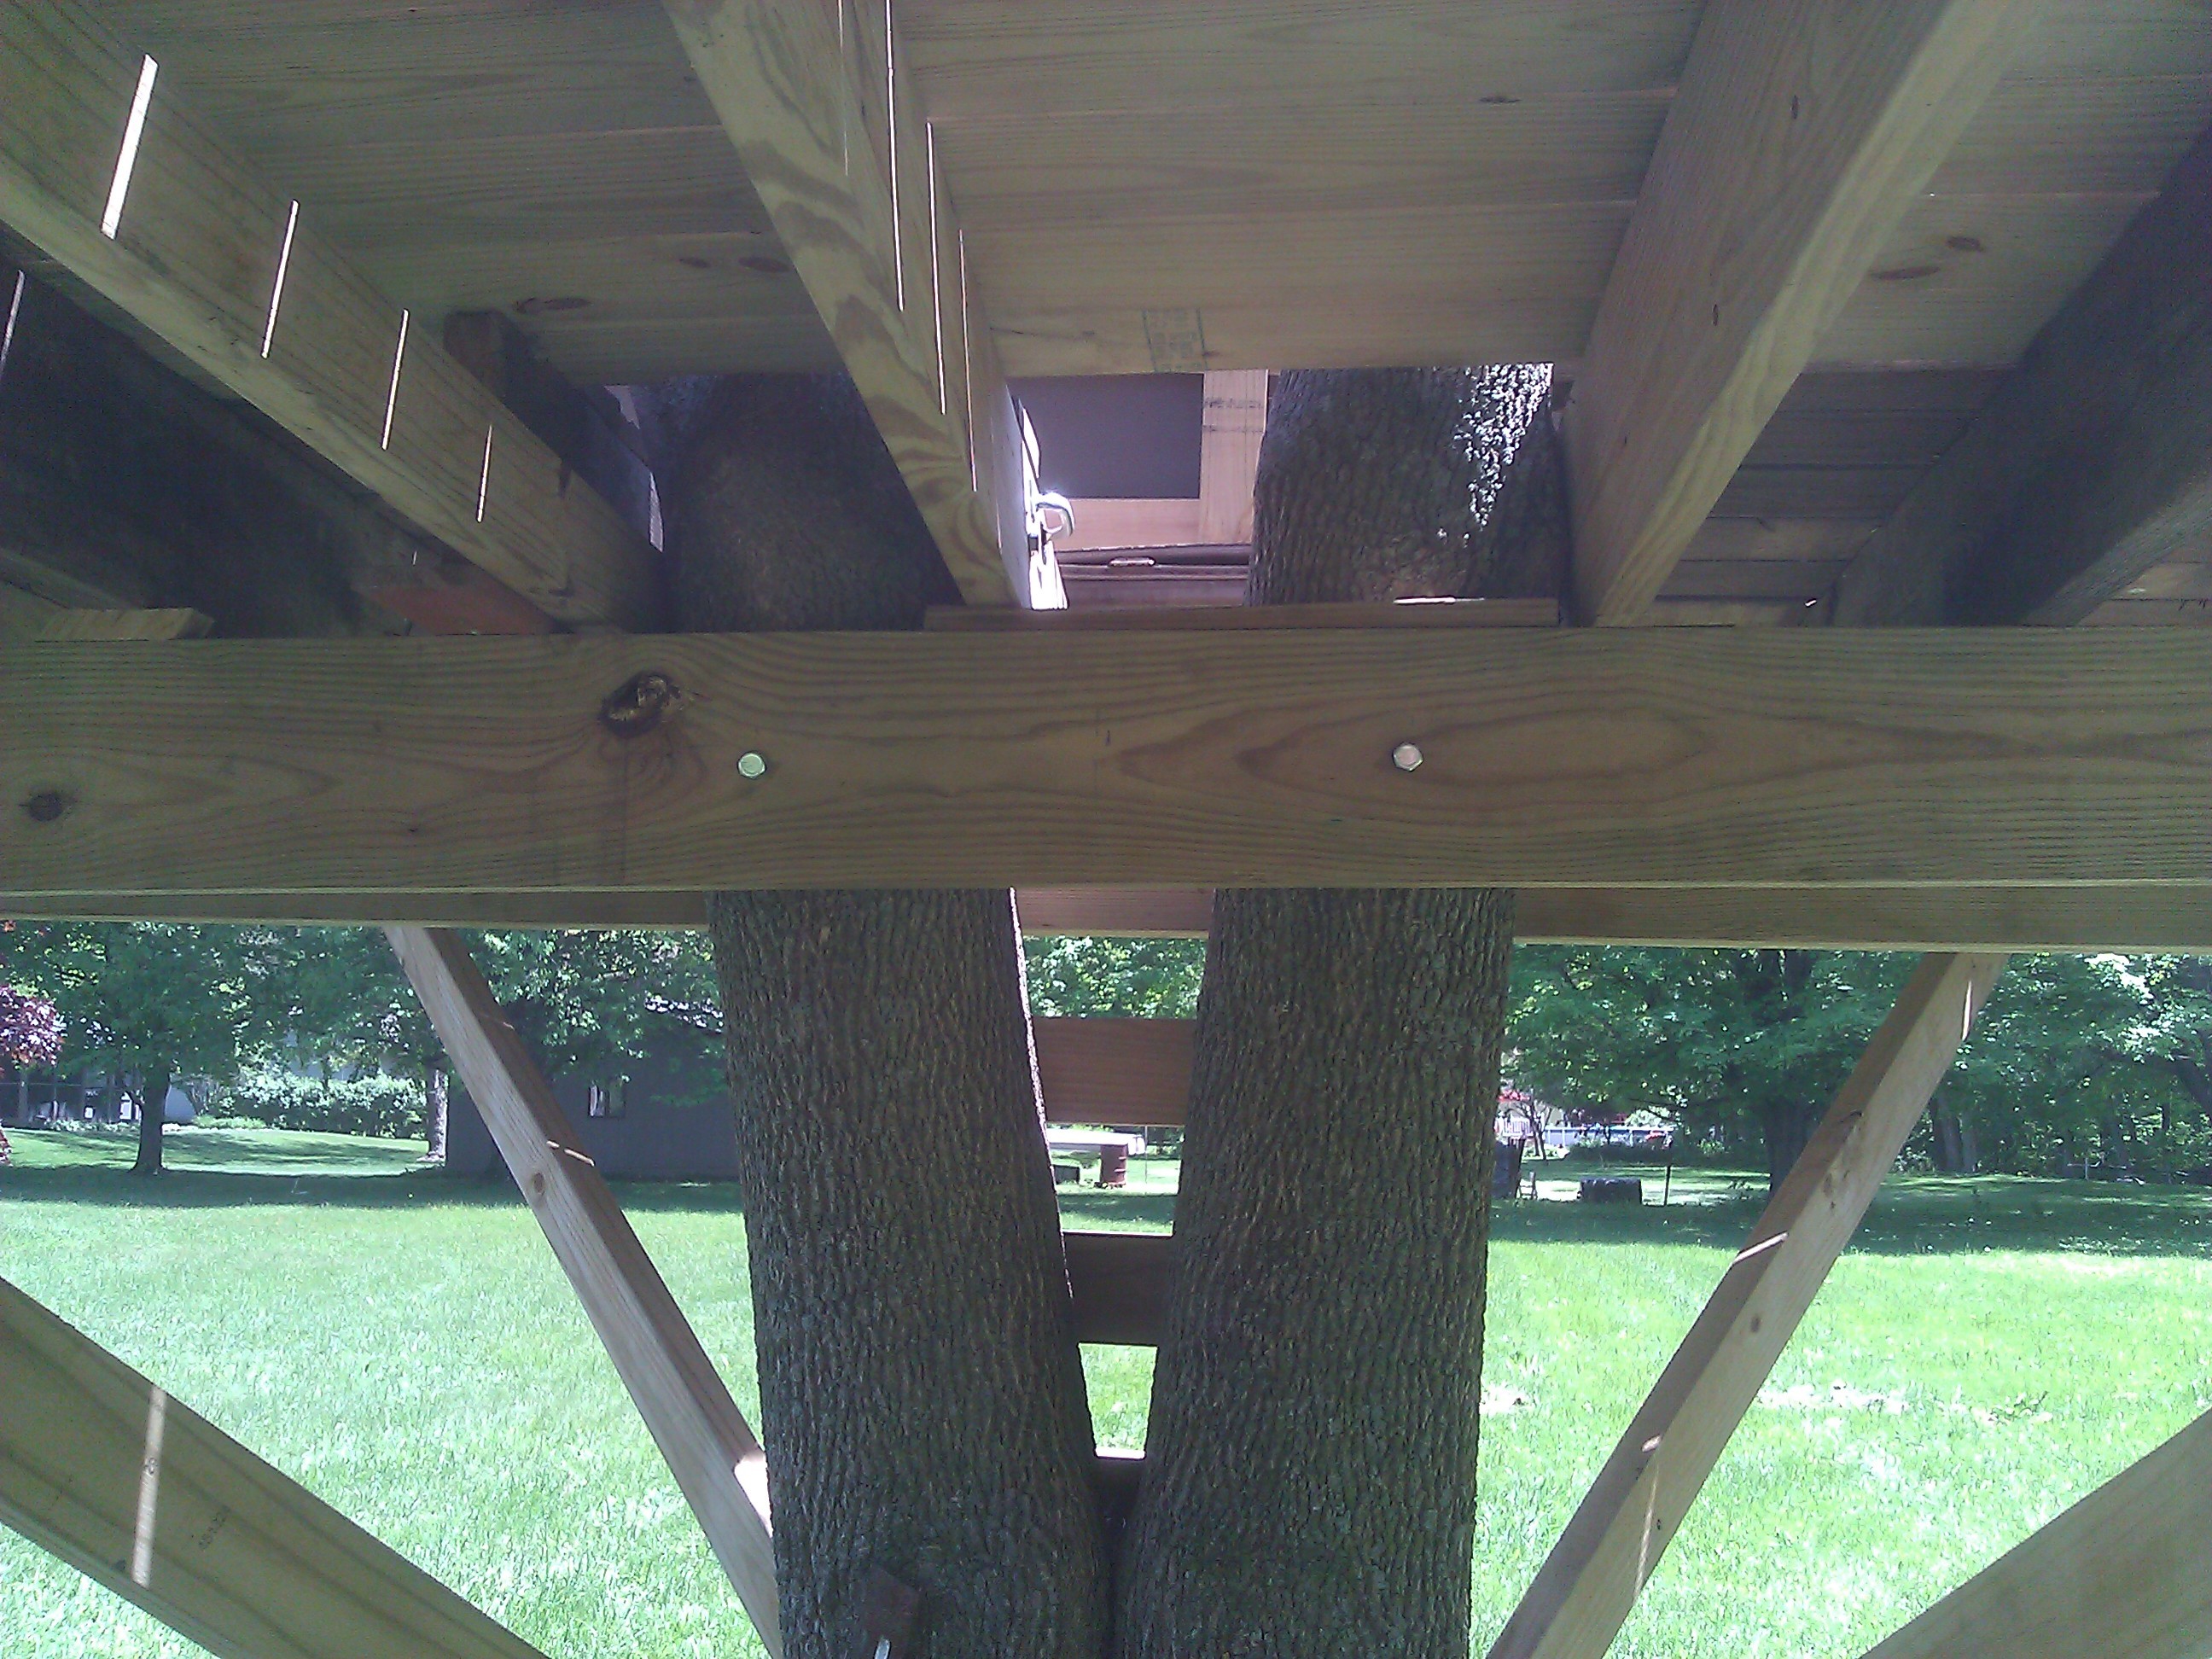 The tree we used splits off into two shoots a bit below where we started building the supports. This allows for 2 anchor points, which makes the tree fort sturdier, but it also makes leveling a much more difficult task. If I could do something over again I would have had another guy come over and help me build this thing, at least for the beginning stages of putting up the 4 main beams. Because I did this myself, and it is really, really, difficult to hold up an 8′ long 2 X 8 at almost 7′ and throw in lag bolts level against a round surface (another good reason to build a tree house at 5′). My tree fort is not very level, plumb or square. In the end I had to do some shimming to make the structure as sturdy as possible. I can jump up and down in all four corners without the treehouse giving in.
Elements:
Slide: To me this is the centerpiece of the tree fort. The slide is fun for adults and kids and it gives a lot more utility to the fort. If I wasn’t able to buy the slide at the scrap yard I would have built a couple steps down from the platform to allow a slide designed for a 5′ fort to go with it. This is the length of slide where the price point isn’t insane. You can get a slide designed for a 5′ platform at Amazon a decent price.
Trap door: I love trap doors. I will have to switch this out every few years unless I replace it with a better kind of wood. I used 3/8″ plywood which was light enough for the kids to open and strong enough that if stepped on when closed it won’t break. I included a safety handle just underneath the door for the kids to hold onto while opening it. This helps the little kids a ton with getting up there without adult assistance. With the help of the safety handle my youngest nephew mastered climbing up there unassisted about a month before his third birthday.
Wheel well: I took a 2 X 4 and carved out an indent in the bottom to allow the wheel to sit, and put a bolt through the center to hold the assembly. I originally had a plastic bucket set up, but they broke it. I need to get a stronger bucket.
Ladder: For my tree house this is currently just some boards screwed into the tree. I originally wanted to do a rope ladder, but a rope ladder is a bit more difficult for the younger boys. As they get older I hope to be able to upgrade to rope ladder.
I love this rope ladder from Amazon
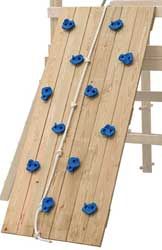
Future Additions: I want to add on some little accessories, like a telescope and a pirate steering wheel. Another fun thing I would like to do is add a rock climbing wall. Something like the picture here. I think overall tree forts can become a slippy slope on spending; there is always something to add on. There are zip lines, and fireman poles, and drawbridges and so many other cool things. I can see how some people end up spending thousands of dollars building a tree house.
Conclusion
I didn’t have to spend a fortune building a tree fort, nor did I have to be a master carpenter. Making the fort safe is important, but overall building is very forgiving. My boys and my nephews range in age from 11 to 1 so this fort will get plenty of use for years to come. The $300 spent building it and 20 bucks here and there to improve it is money well spent that has already provided several hours of amusement for the kids. Much cooler than a video game system!
Have you ever built or tried to build outside toys for your kids?
UPDATE: 7/20/2015: This summer The kids and I built a really cool Monkey Bar Set for only $100!
UPDATE: 5/30/2015: We are beginning our fourth summer with our tree house, and as it has aged I have learned a few lessons that I think would be beneficial for anyone starting on a similar endeavor. The tree we built the tree house is is now dead. This was my biggest fear when I built the thing and in retrospect I should have taken more steps to save it. When I built the tree house in 2013 we were in the middle of a drought. Another decent tree we had in our yard died the same year. I think if I had paid more attention to these trees and watered them daily throughout the drought they both would have survived.
Obviously the extra stress on the tree of having several lag bolts drilled through it and some fairly serious pruning did not help the tree survive either. If I could go back I would have waited a season after building the tree house to prune branches that were in the way. During the middle of summer I cut off several branches directly after building the tree house. I should have waited until the tree was dormant in the winter.
Another area of improvement on this tree house design is safety. The two sides with the pirate ship facade are OK, but the 2 2X4 rails I put running around the tree house are not sufficient for little explorers. My adventurous 2 year old nephew started sticking his little feet of the edge in order to give Mrs. C. a heart attach. I closed those sides in on the bottom 3 feet with plywood as well.
Update July 2018: I can’t believe it has been 5 years since I built this thing! The kids are now 15, 9, 6, and 5 and all of them still use it regularly in its 6th summer of existence. As far as entertainment value goes building this tree house was certainly well worth the cost and the time involved. I had to cut most of the tree down this spring, leaving only about 8′ above the platform. The tree has been dead for some time and I was worried about falling branches. I plan on adding a tarp over the tree house to provide shade in the coming weeks. The tree fort is used all the time for nerf gun fights, water balloon fights, tag, and even regular imaginative play.
Overall this tree house has served us well for going on 6 summers. Even though the tree that holds it is dead, the tree is still in stable condition and should safely hold the tree house for many years to come. My boys have had literally hundreds of hours of fun playing in the tree house and I would build it again in a heartbeat.
If you liked this tree house project, check out our new Gaga Ball pit and my new article on how to build a swing set!
Leave a Reply